Overview
Horizon on Amazon WorkSpaces Core refers to the integration of Omnissa Horizon 8, a virtual desktop infrastructure (VDI) solution, with Amazon WorkSpaces Core, a fully managed VDI infrastructure service on AWS.
In this post, I will explain the perquisites and deployment steps for Horizon 8 on Amazon WorkSpaces Core. I will split this post in Part-I and II to make easy to go through. Part-I will cover configuration and installation of Amazon VPC, Networks, Directory Services, IAM Role, Omnissa Horizon 8 and Unified Access Gateway (UAG) etc. I will also cover some possible issues you may hit during the deployment and it`s resolution as troubleshooting tips. In Part-II, I will cover importing the images/bundles and deploying the desktops pools.
Before the installation, it is always crucial to configure the Amazon VPC, Networks, IAM Roles/permissions and Security Rules correctly so that the deployment would go smoothly.
Amazon VPC and Networks
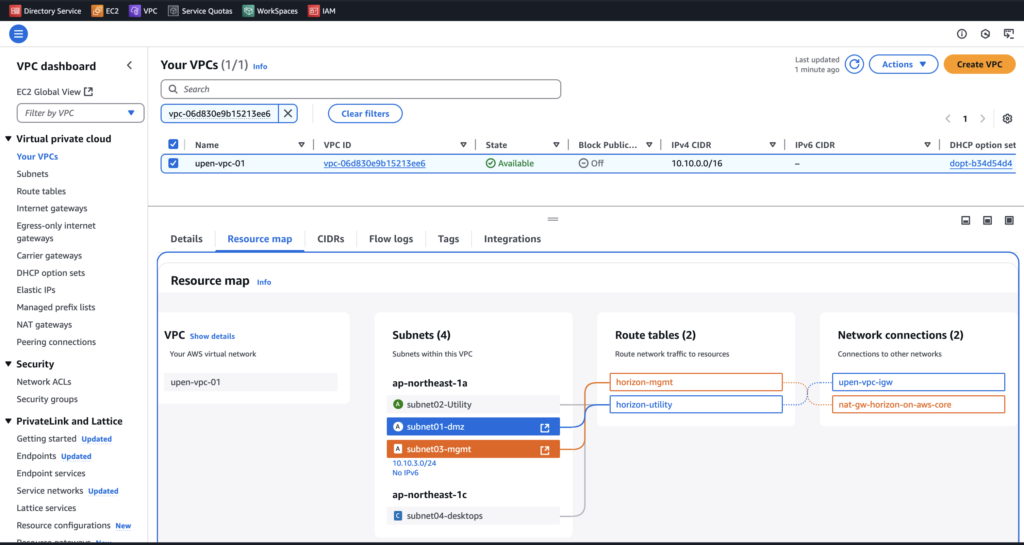
In my test deployment I have configured the AWS VPC and Network as seen in below diagram. I have created 4 subnets where Subnet01 for UAG DMZ, Subnet02 for utility servers like DNS/Domain Controller, Subnet03 for Horizon 8 management and Subnet04 is for VDI desktop pool.
Subnet01-DMZ is pointed to internet gateway (iGW) as it needs to be exposed to public internet for accessing the VDI desktops from external networks. The subnet03, where the Horizon 8 Connection Server will be installed, is pointed to NAT gateway because Horizon CS needs to communicate with Amazon Workspace Gateways (internet facing but uses the AWS backbone networks) via NAT gateway for the WorkSpaces Core capacity (aka provider) for the images/bundles and desktops workload. As VDI pool desktops need the internet access, I have pointed the Subnet04-desktops to NAT gateway.
EC2 Instances
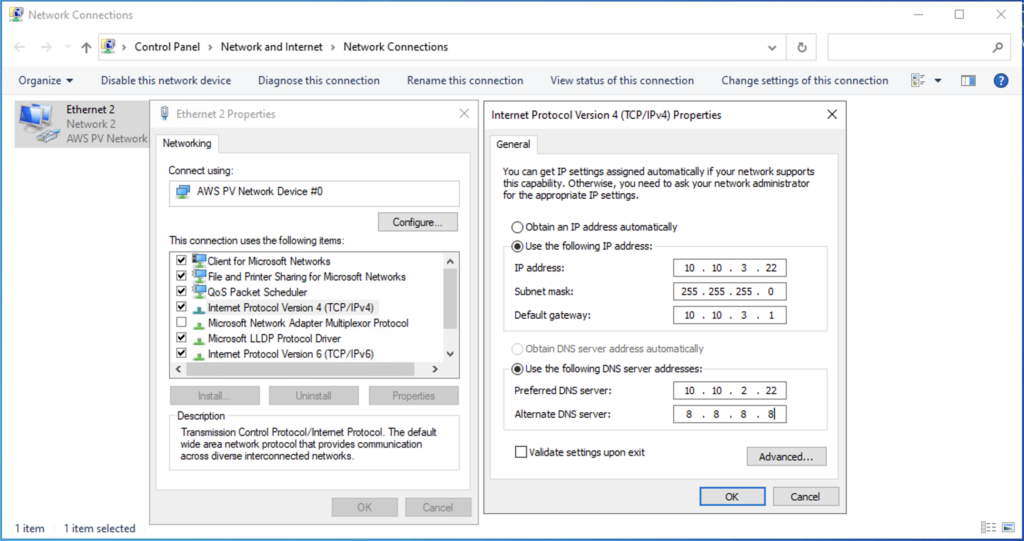
I have created 2 EC2 instances with static private IP. I highly recommend to configure the static IP in EC2 instance which are used for the management components like DNS, DC, CS, UAG etc so that it wont give the DNS/Network related problem in future. One of the EC2 instance will be used for Horizon 8 Connection Server and another for DNS and domain controller. I have configured domain as “eucworld.net”.
Domain Controller IP – 10.10.2.22
Connection Server IP – 10.10.3.22

Let`s start the deployment
Create directory for Amazon WorkSpaces
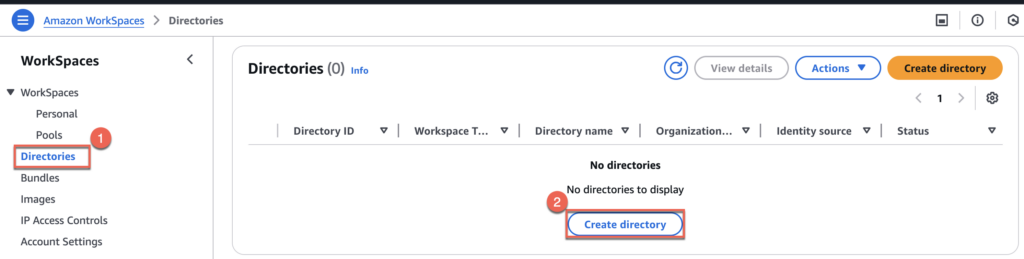
- Login to the AWS console and navigate to WorkSpaces > [Directories] > [Create Directory].
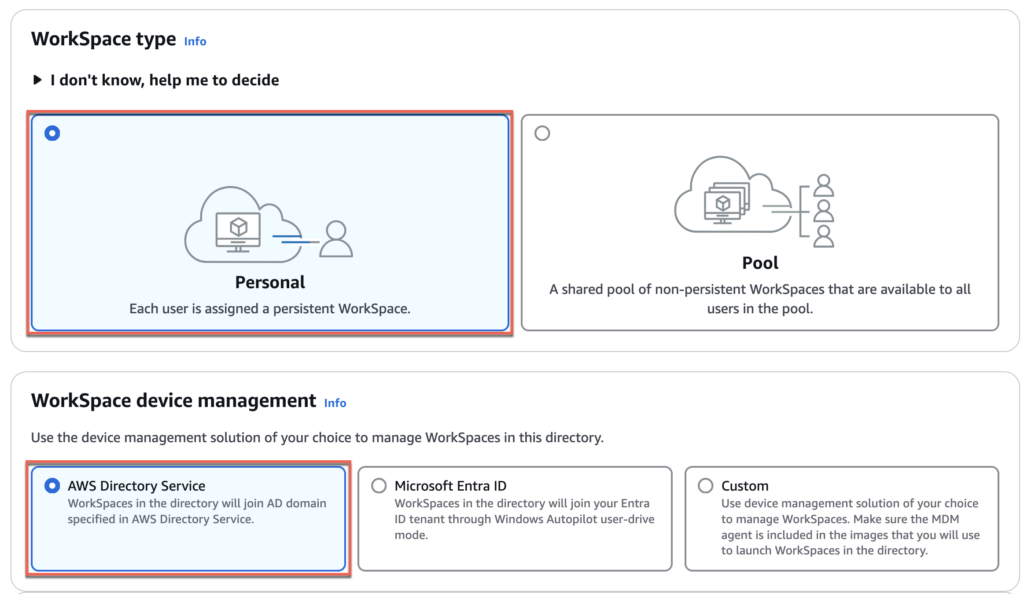
2. Select [Personal] as workspace type and [AWS Directory Service] as workspace device management.
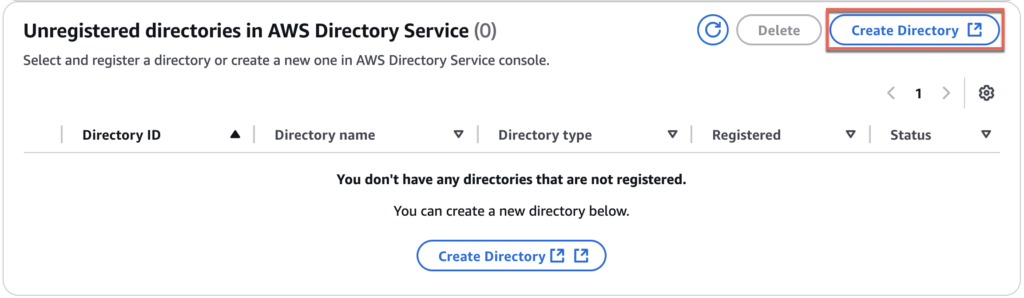
3. Select [Create Directory] in “Unregistered directories in AWS Directory Service” section.
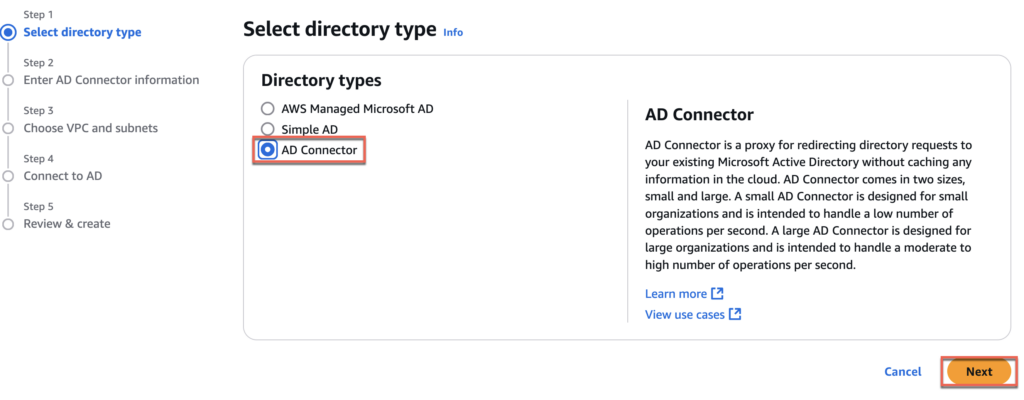
4. Select [AD connector] as directory type and [Next]
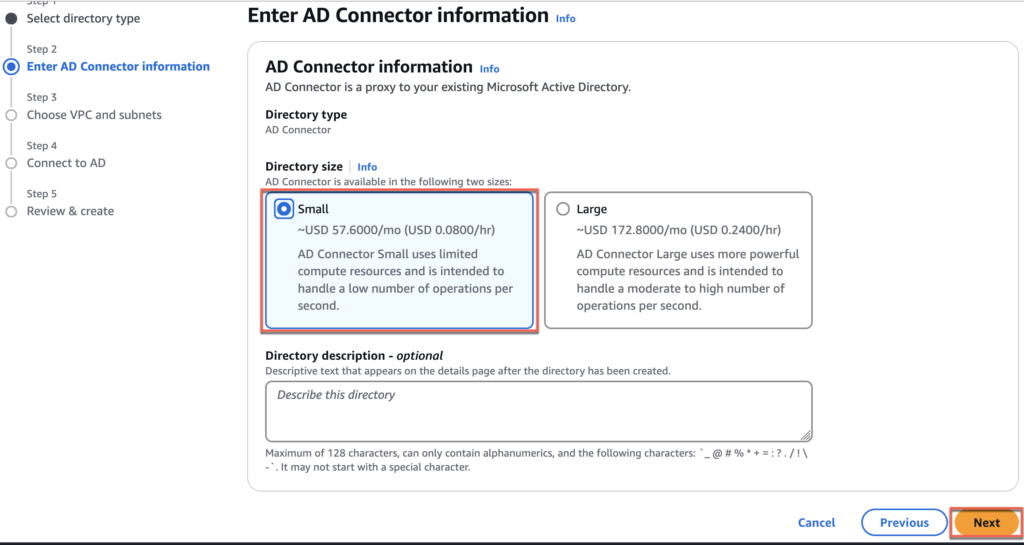
5. Choose directory size as [Small] and [Next].
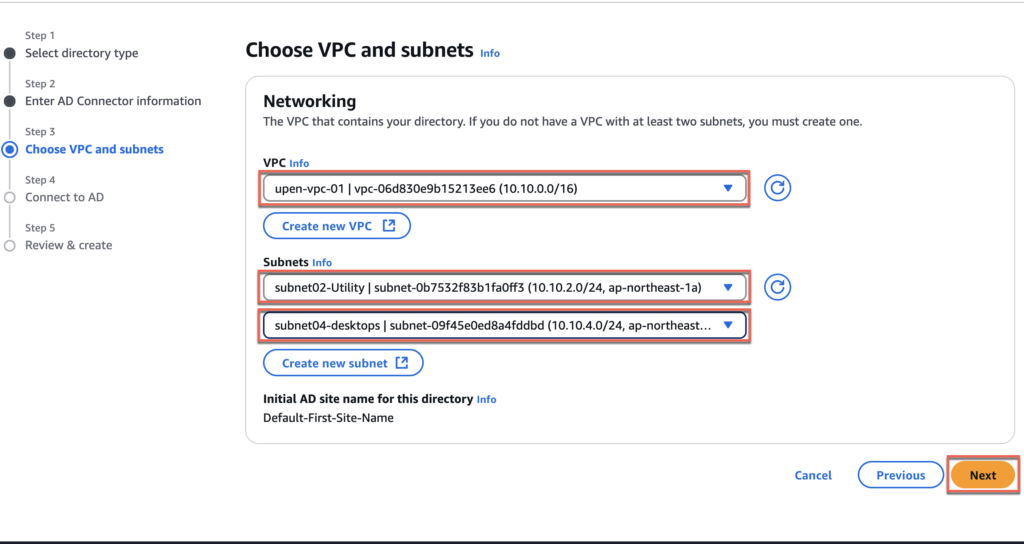
6. Choose your appropriate VPC and Subnets > [Next]
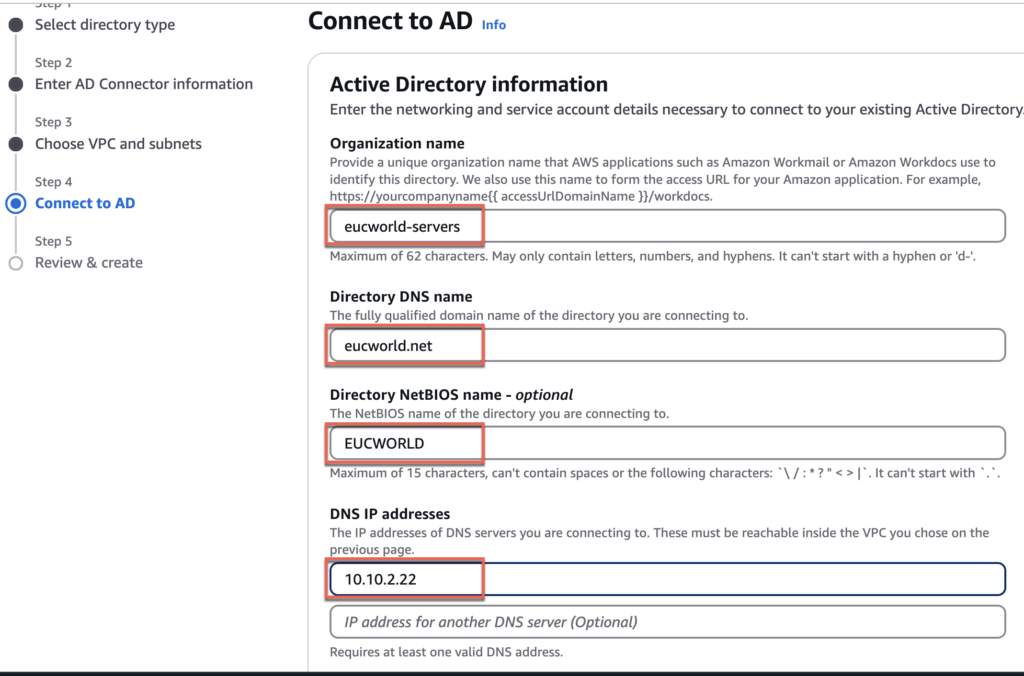
7. Give the name of your choice to the [organization name] > [Directory DNS name] > [Directory NetBIOS name] > [DNS IP addresses] > [Service account username and password] > [Next].
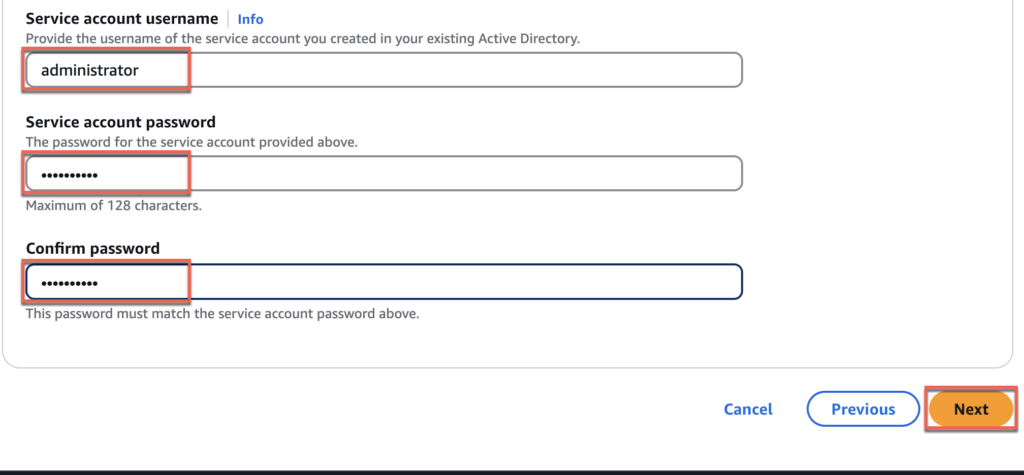
8. Double confirm your parameters and select [Create Directory]

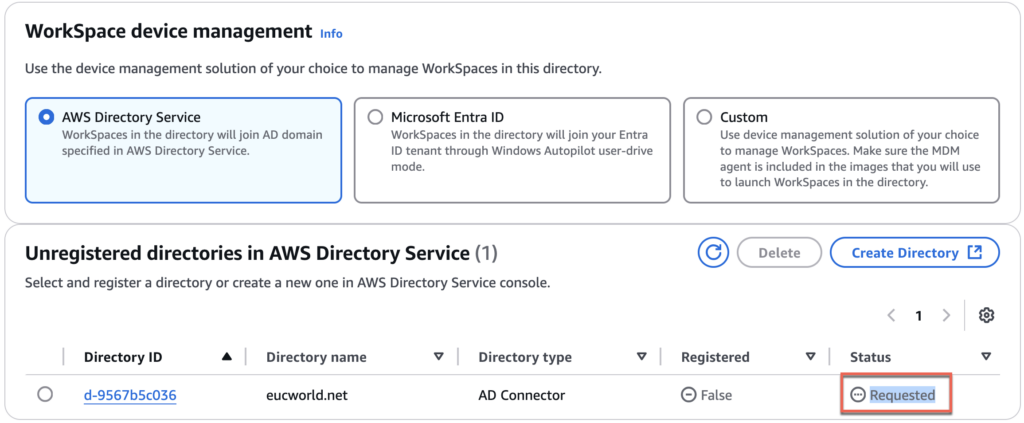
9. Directory creation is requested. It may take 8-10 mins until it becomes active.
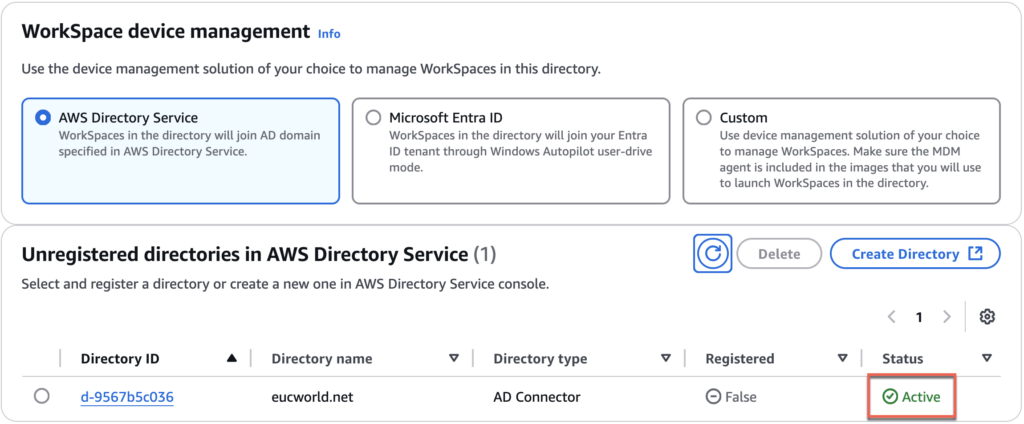
10. Confirm the directory status is [Active].
11. Select the directory which you have created above> register the [Subnets] of your VPC > [Register].
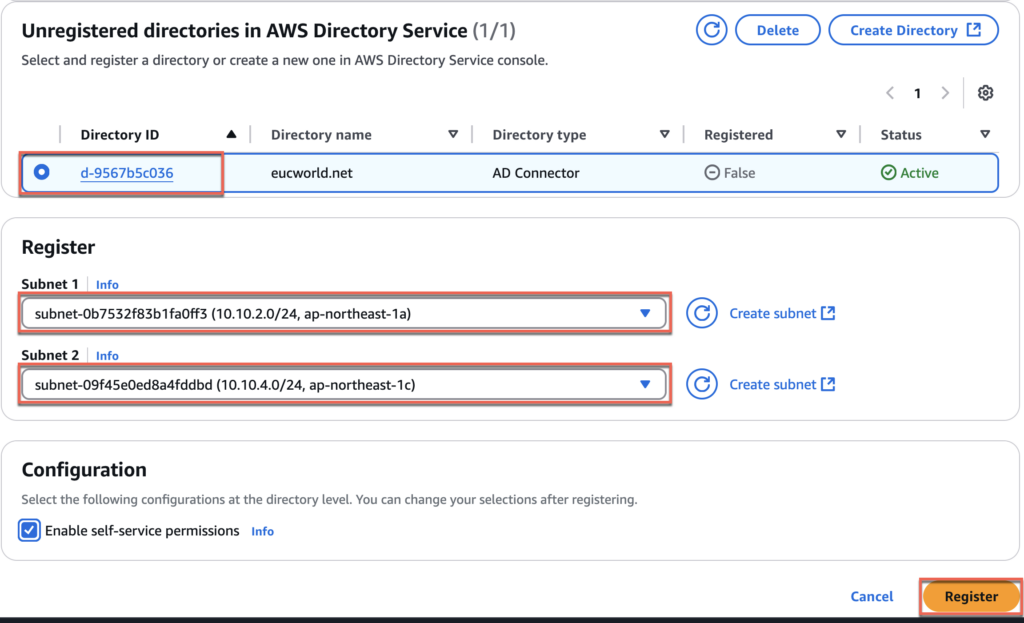
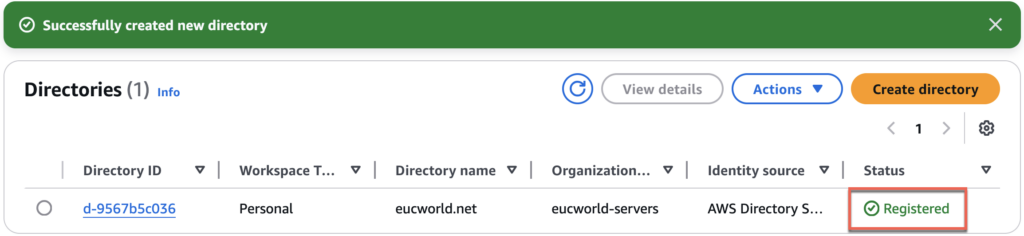
12. Confirm the directory status is now [Registered]. You are all set with directory setup.
Directory setup tips: 10
While creating Directory, you may get error message like below if the TCP/UDP port 53 (DNS) and TCP/UDP on port 88 (Kerberos authentication) inbound is not allow to the DNS/AD server. You can find further details in doc.amazon.com.
” Configuration issues detected: DNS lookup for realm name failed for IP: 10.10.2.22, SRV record for LDAP does not exist for IP: 10.10.2.22, SRV record for Kerberos does not exist for IP: 10.10.2.22. Please verify existing configuration and retry the”.

Creating IAM Role. This IAM will be used by Connect Server for using Amazon WorkSpace API.
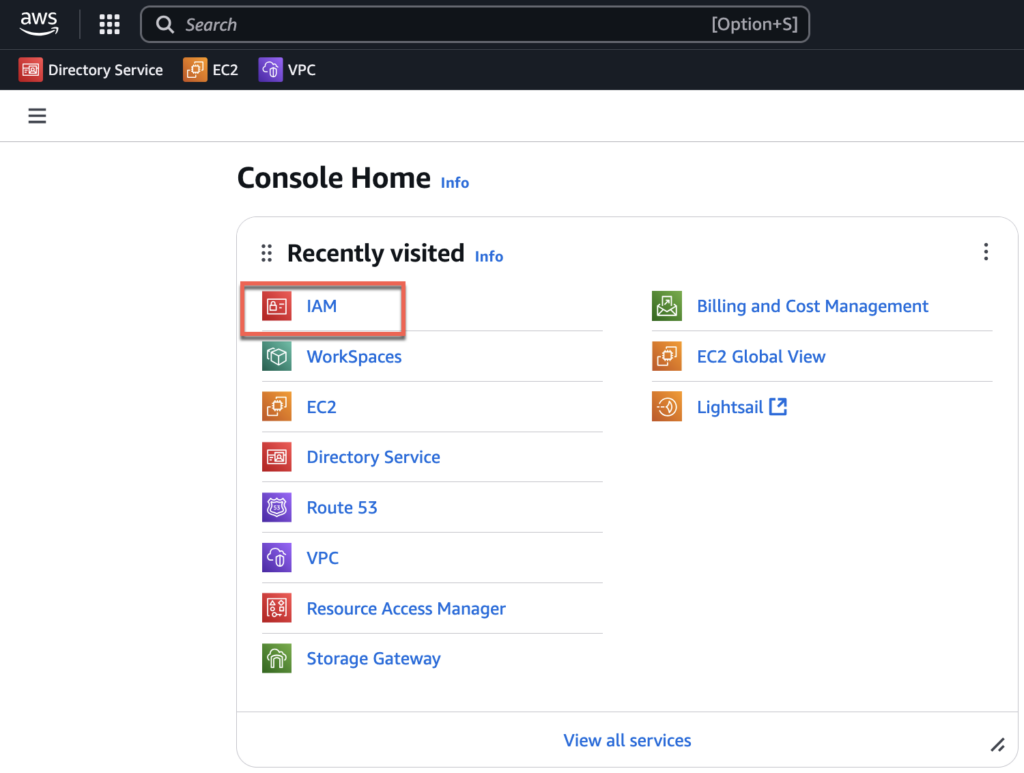
13. In AWS console, navigate to [IAM] > [Role] > [Create Role].


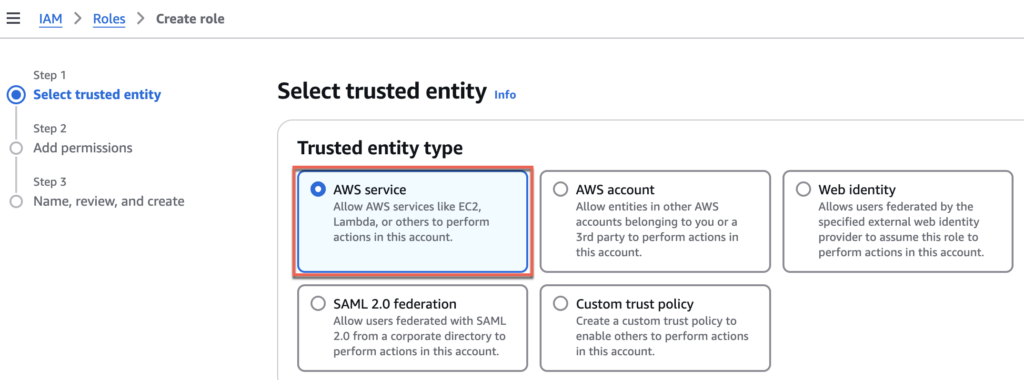
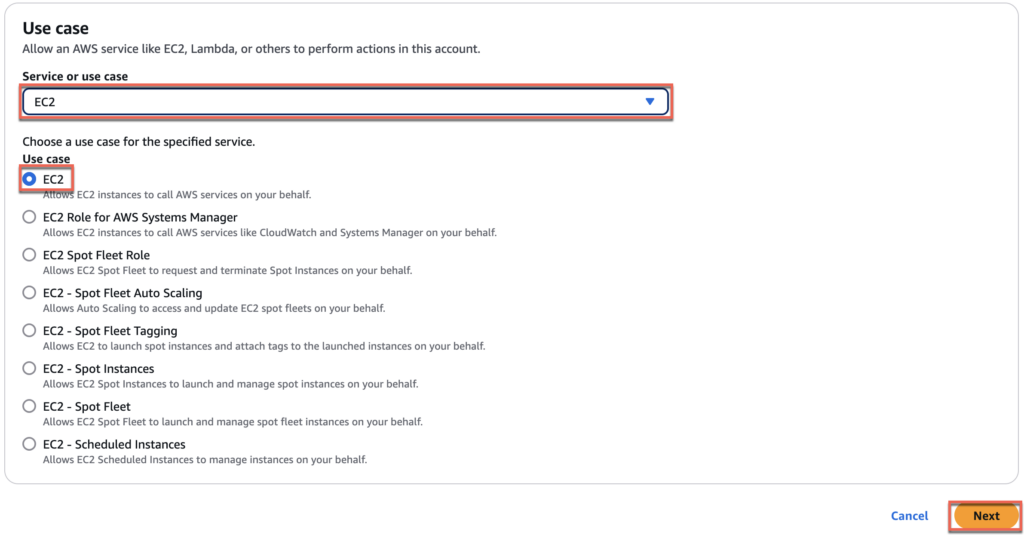
14. In trusted entity section, select [AWS Service] > [EC2] > [Next]
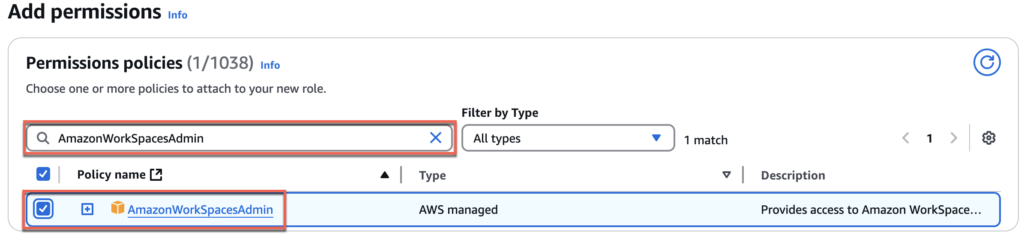
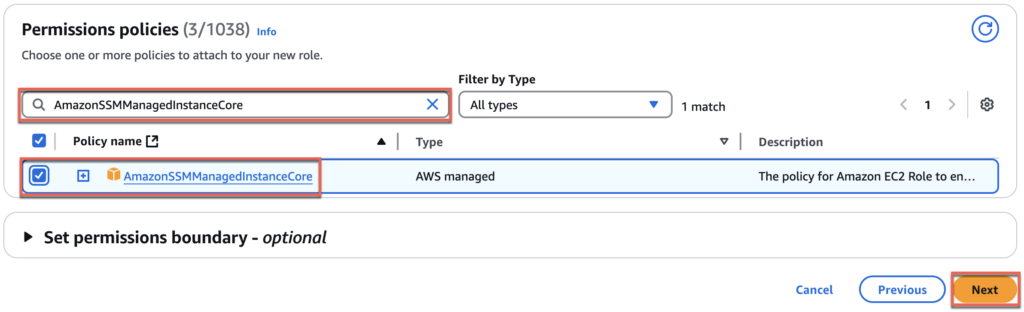
15. Navigate to [Add permissions] > search [AmazonWorkSpacesAdmin] and put the check and do the same for [AmazonSSMDirectoryServiceAccess] and [AmazonSSMManagedInstanceCore] > [Next].

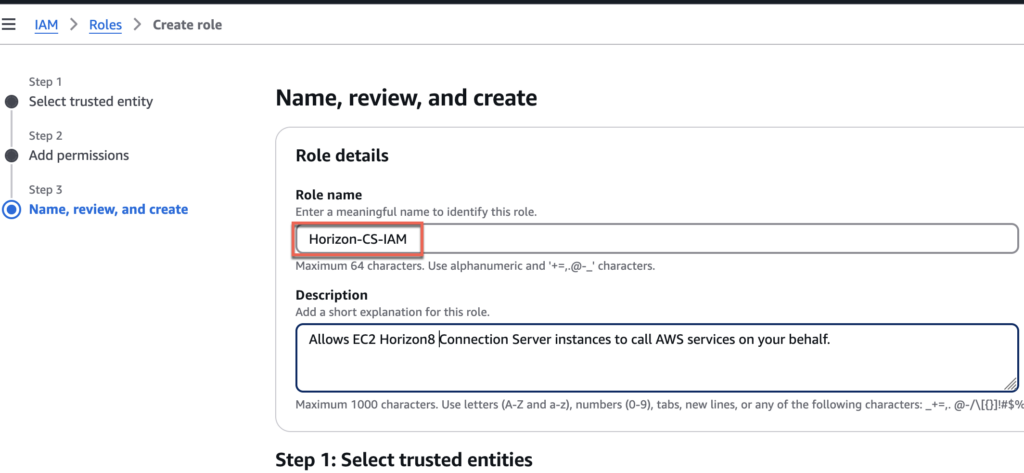
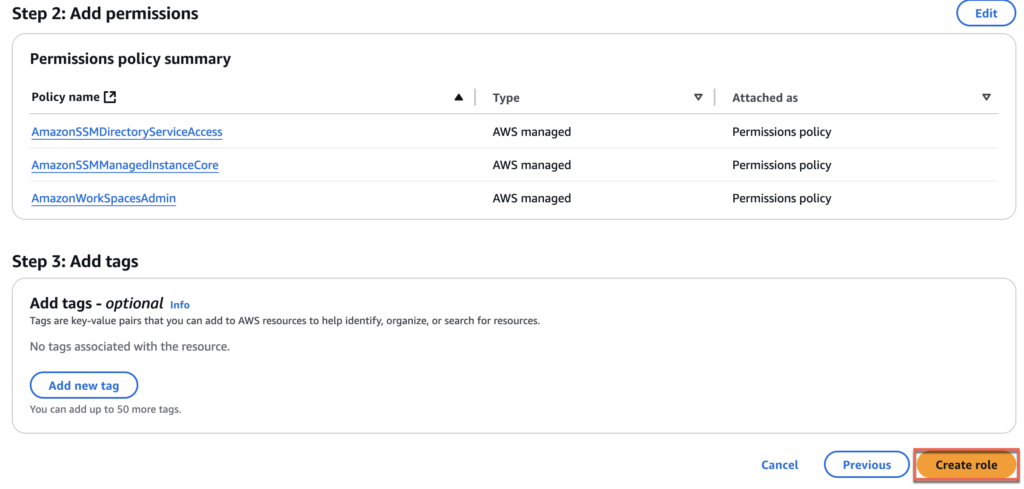
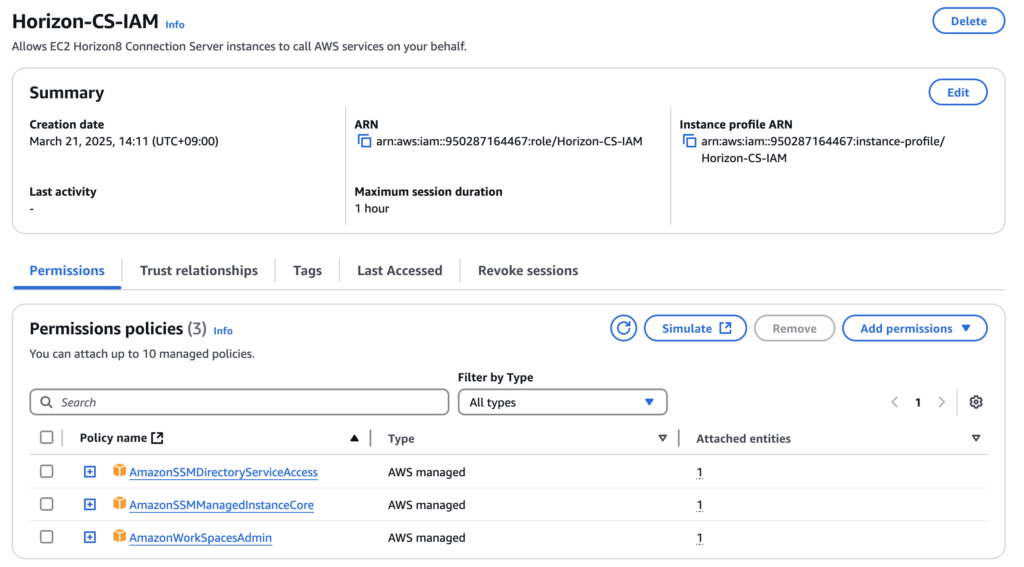
16. Give the name of your choice to [Role name]. In my case, I gave [Horizon-CS-IAM] > select [Create role] and confirm that you have created a role with 3 permissions.
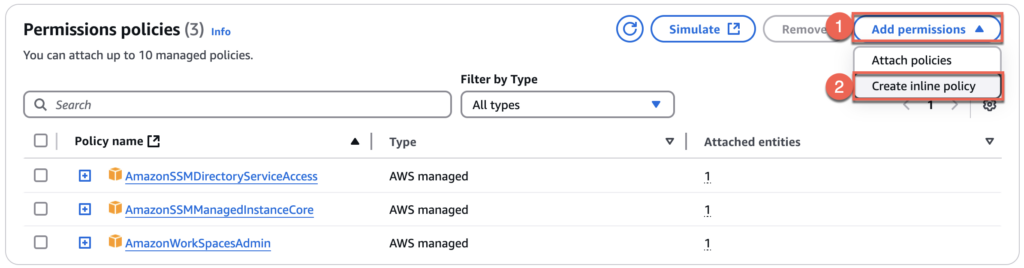
17. Select [Add permissions] > [Create inline policy].
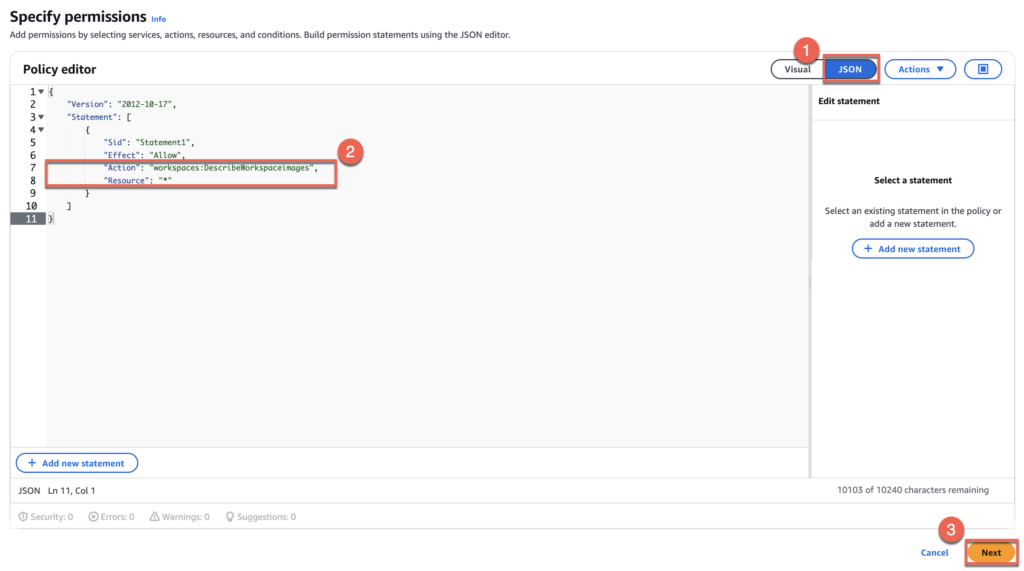
18. Select [Jason] > edit “Action” as “workspace:DescribeWorkspaceimages” and “Resource” as “*” as below > [Next].
{
    "Version": "2012-10-17",
    "Statement": [
        {
            "Sid": "Statement1",
            "Effect": "Allow",
            "Action": "workspaces:DescribeWorkspaceimages",
            "Resource": "*"
        }
    ]
}
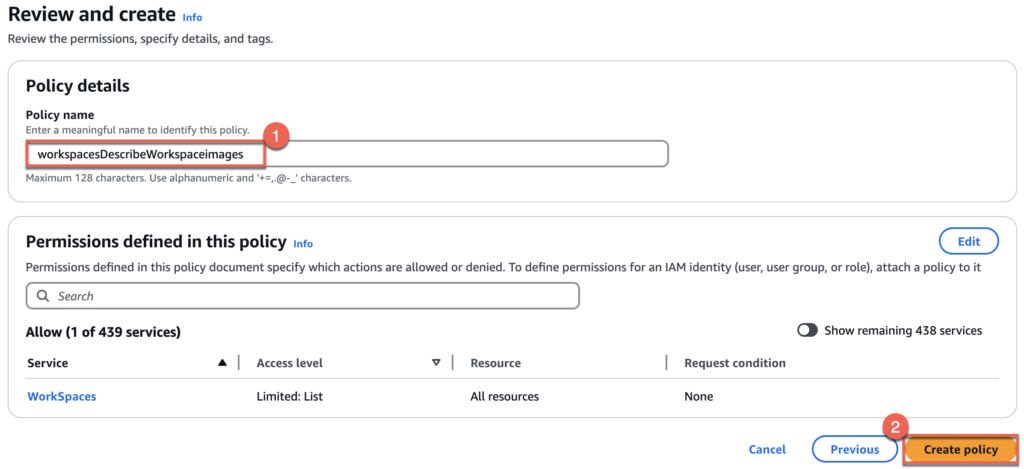
19. Define the [Policy name] for inline policy > [Create policy]. I have defined the name as “workspacesDescribeWorkspaceimages” but name can be anything of your choice > [Create policy].
Note: you can follow the Omnissa KB article for further detail.
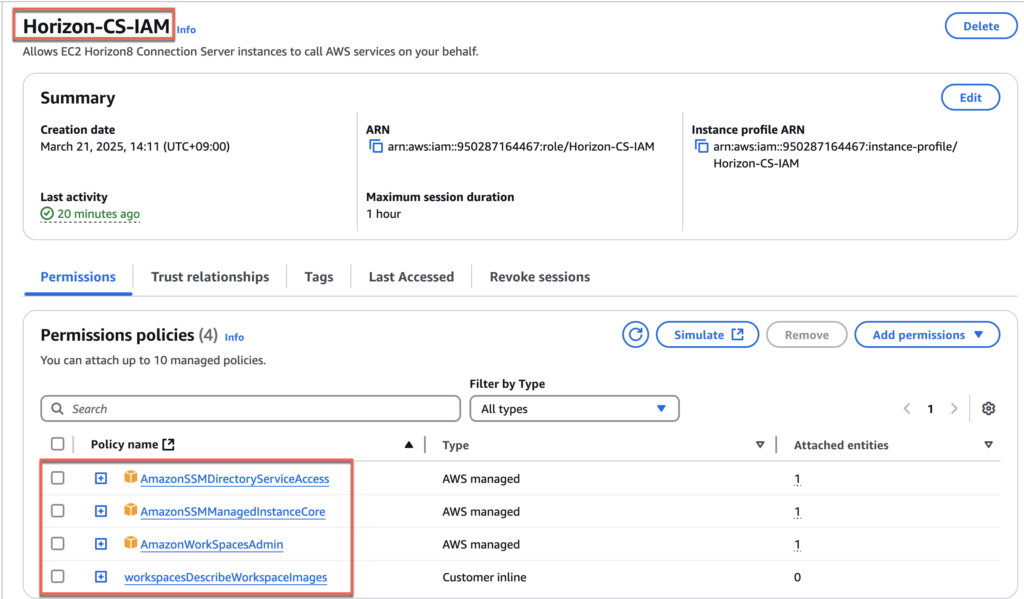
20. Confirm that you have created an IAM with 4 permissions as below.
Installation of Omnissa Horizon connection Server
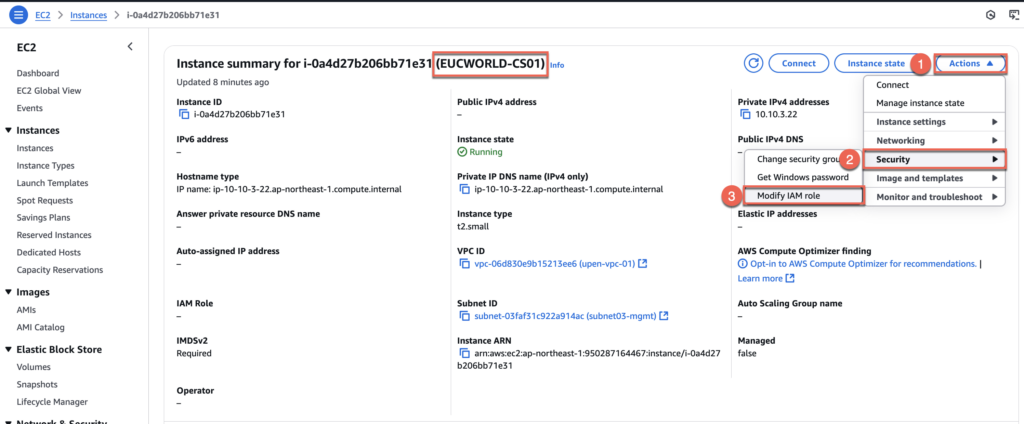
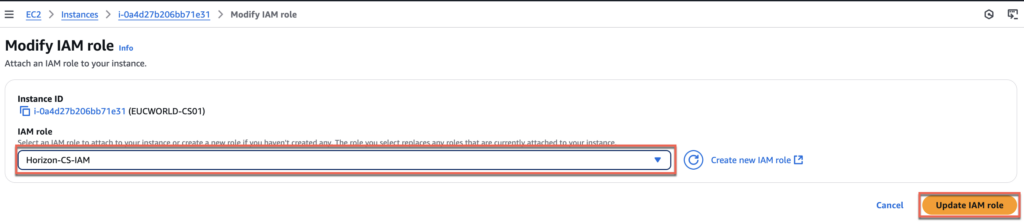
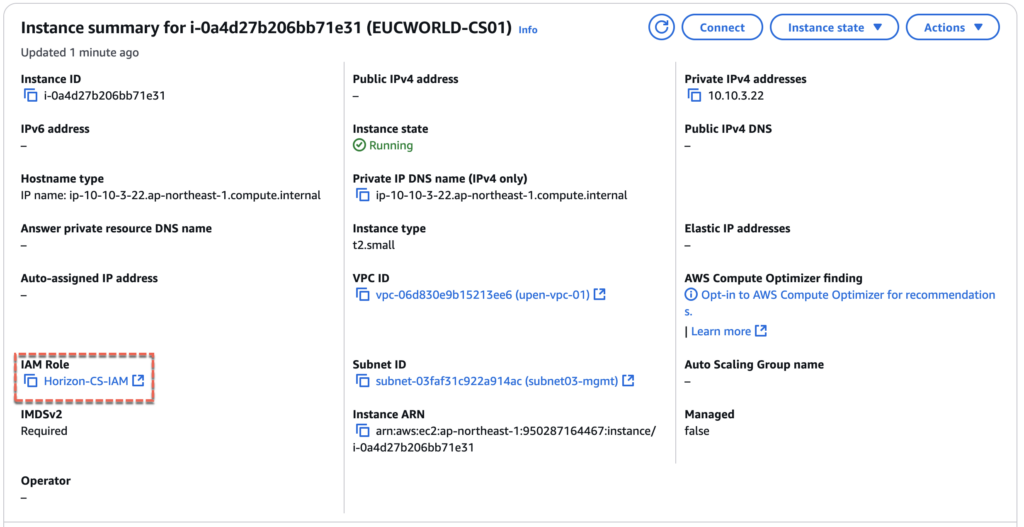
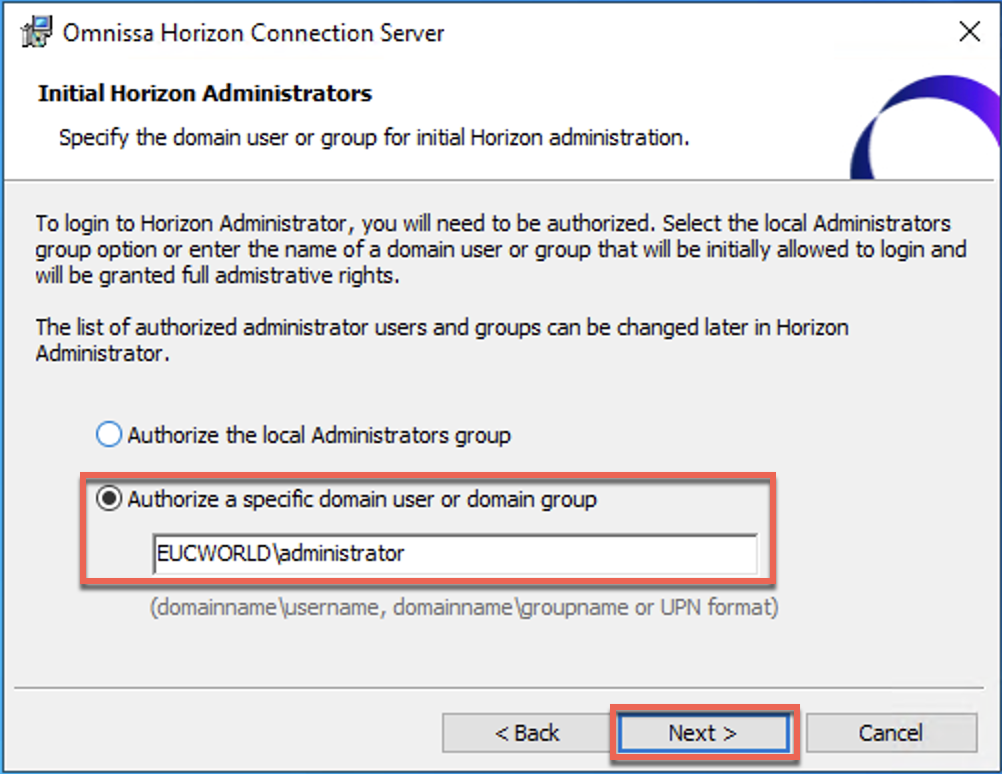
Prior to installing Connection Server, make sure you have assigned the AIM role above created attached to EC2 instance and configure the static IP to the machine. Also ensure that you have set the local administrator password to “Never Expire” and CS machine is joined to the domain.
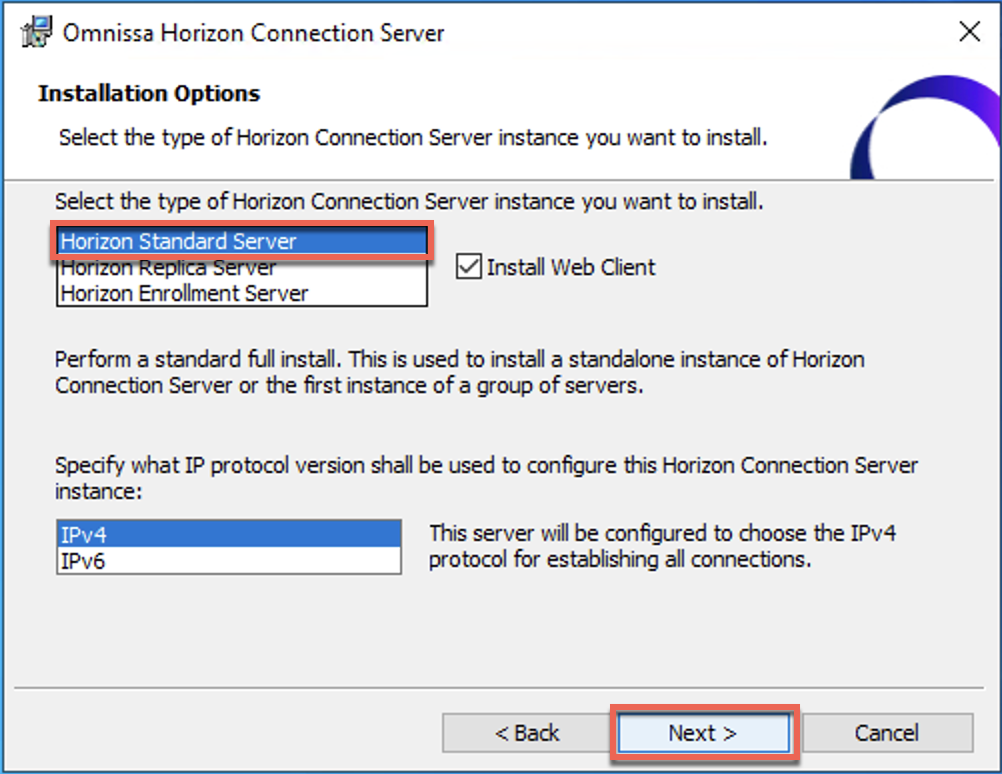
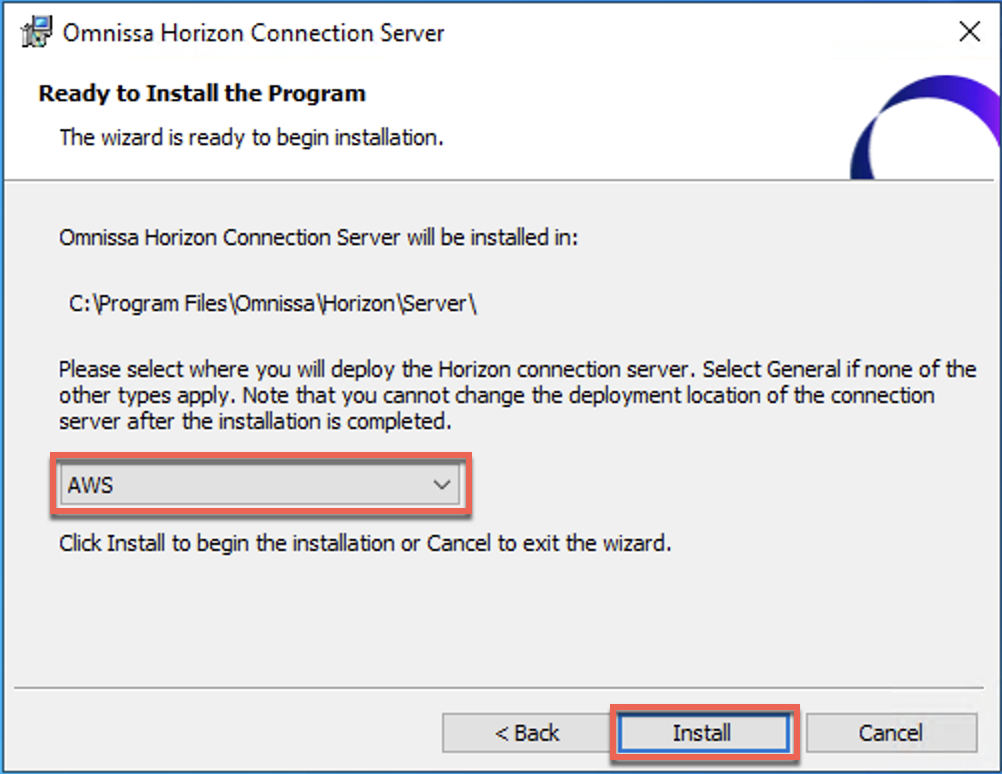
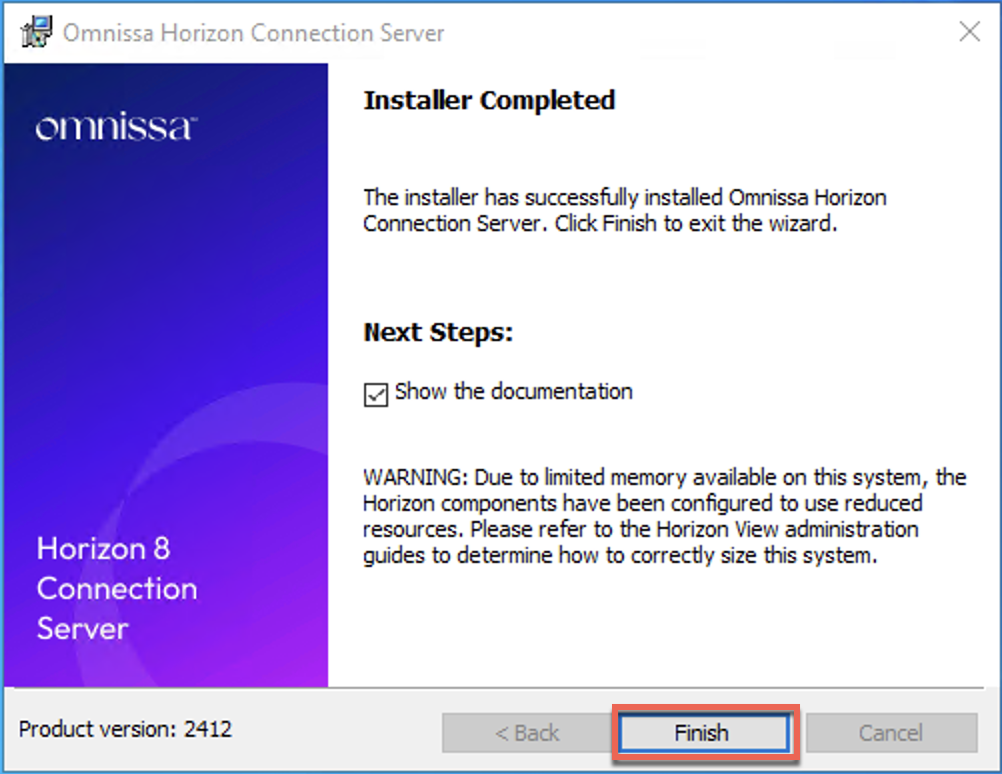
21. Execute the Omnissa Horizon Connection Server installer and follow the on-screen instruction. Select the deployment type as [AWS] > [Finish].


License activation through Omnissa Horizon Cloud Next-gen Service
There are mainly two way to activate the Horizon license, SAAS Subscription license and term -perpetual license. In my test environment I am activating with SAAS Subscription. To activate the SAAS subscription there are two method either by deploying horizon Edge or Edge-less activation. As this is my test environment I am going with Edge-less activation which gives 90 days validity period. If you are deploying for the production, I recommend to activate with Horizon Edge which gives permanent activation. With Horizon Edge you get the benefit of Horizon Infrastructure monitoring and Omnissa Workspace One Intelligence feature like Intelligence Dashboard, DEX and so on.
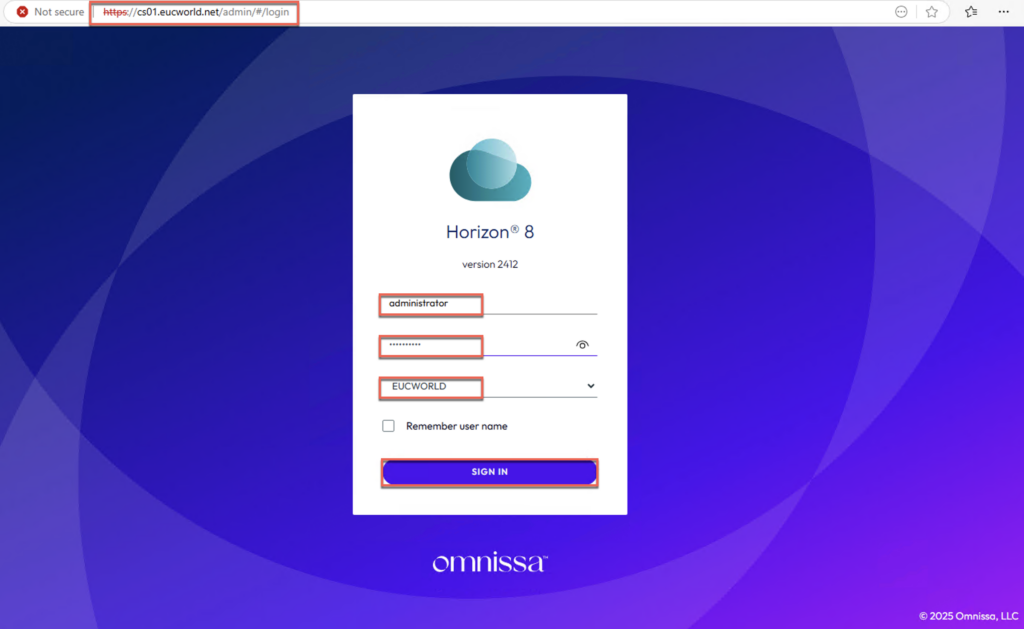
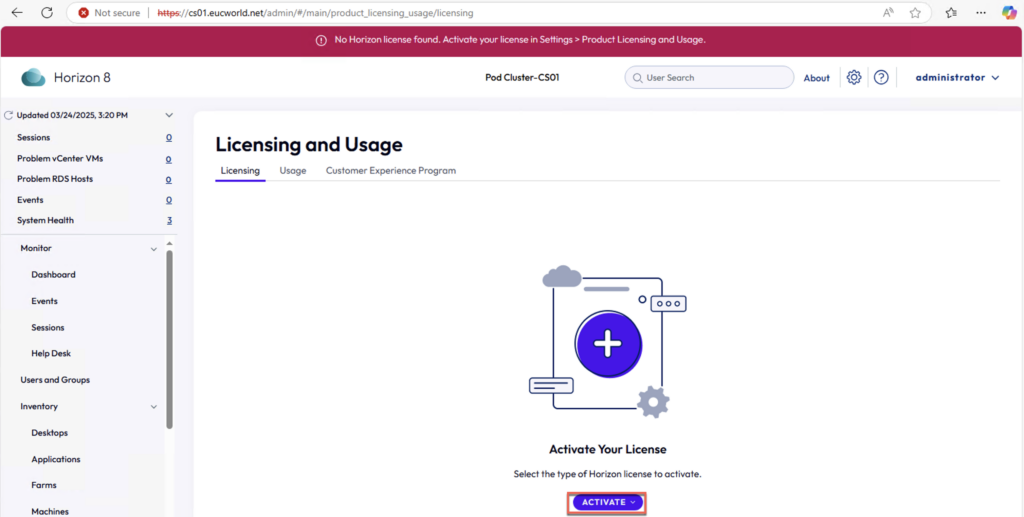
22. Access the Horizon Connection server admin portal with “https://<CS FQDN\admin” and login with Horizon administrator username and password.
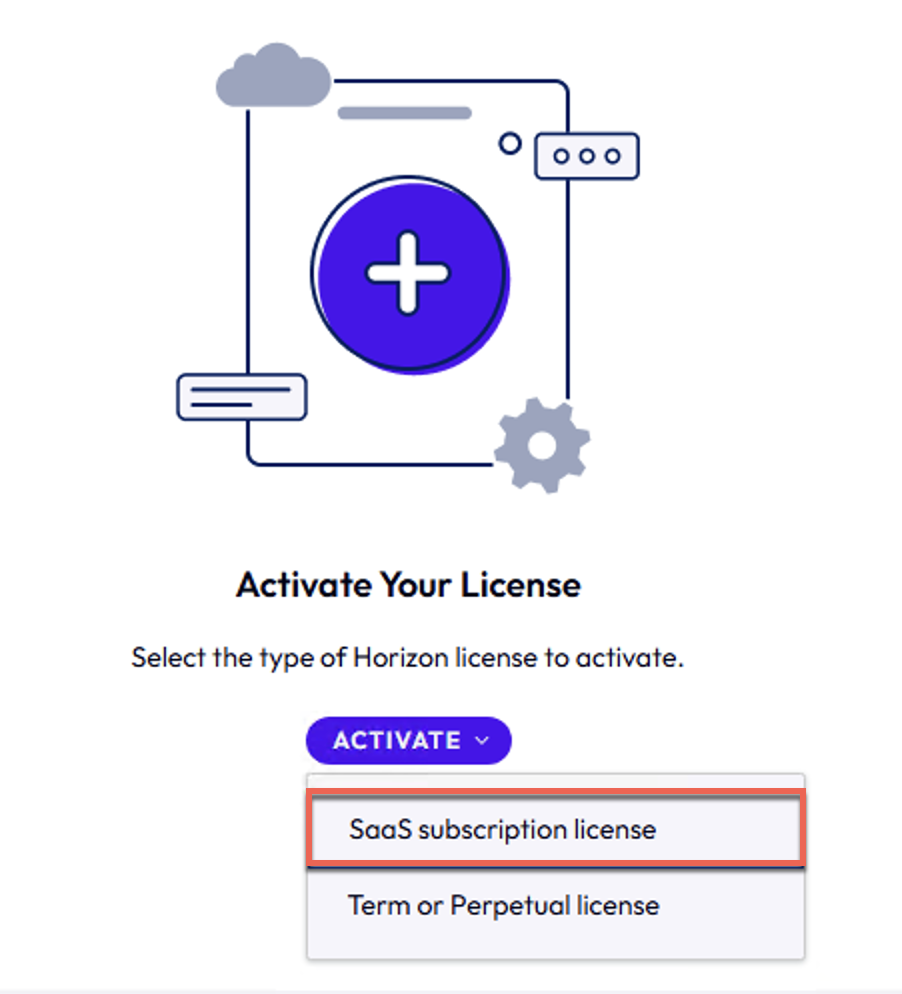
23. You will get the Licensing and Usage page > select [ACTIVATE] > [SAAS subscription license]
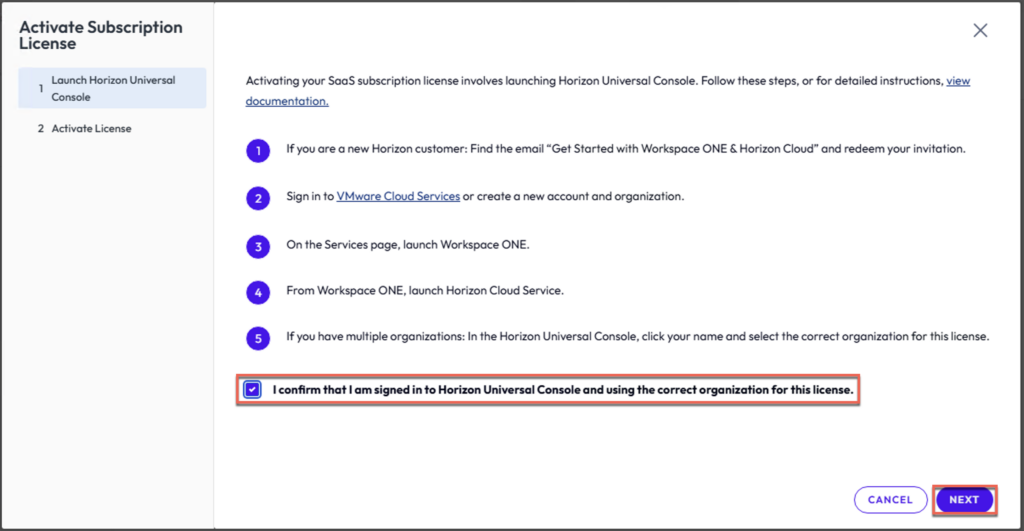
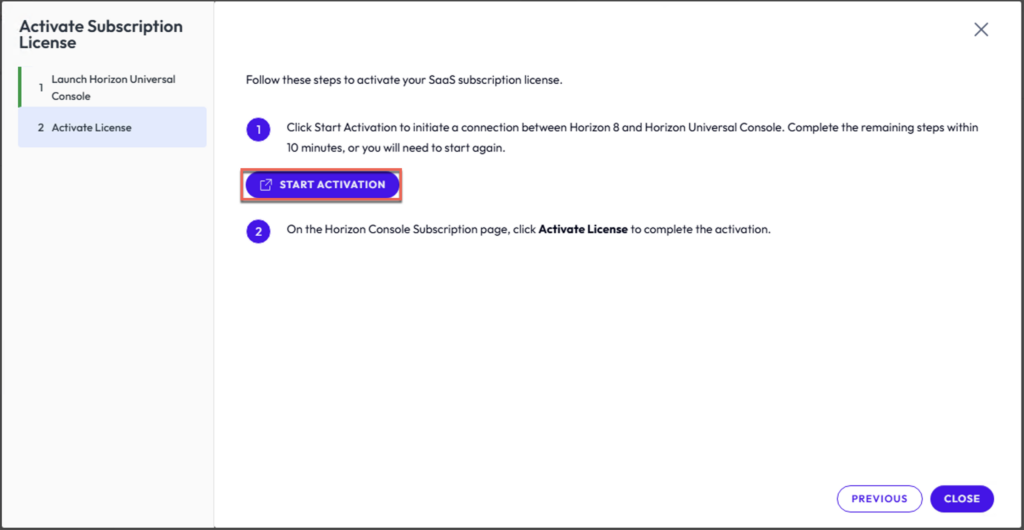
24. Confirm you are signed in to Horizon Universal Console and using correct organization for the licensing > [Next] > [START ACTIVATION]
25. You will get redirected to Omnissa Workspace One Cloud portal. Login with your Omnissa customer connect credential.
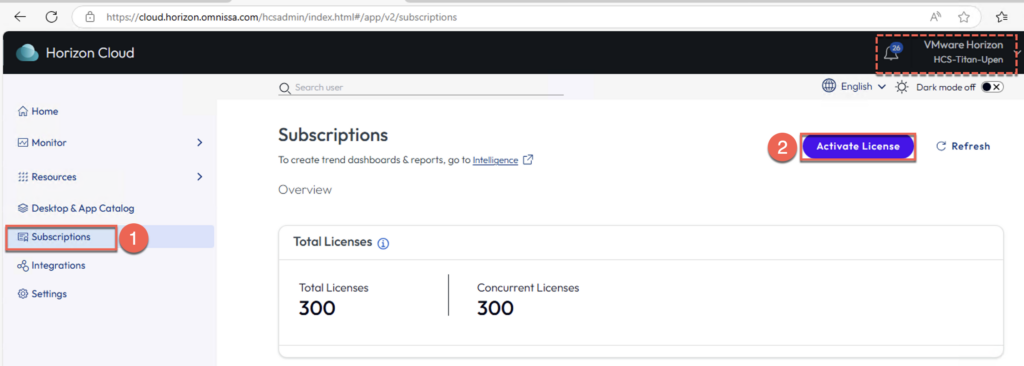
26. Select [Subscriptions] in the left pane of the Horizon Cloud Universal Console page > [Activate License]. You will see the green banner if the license is activate successfully.

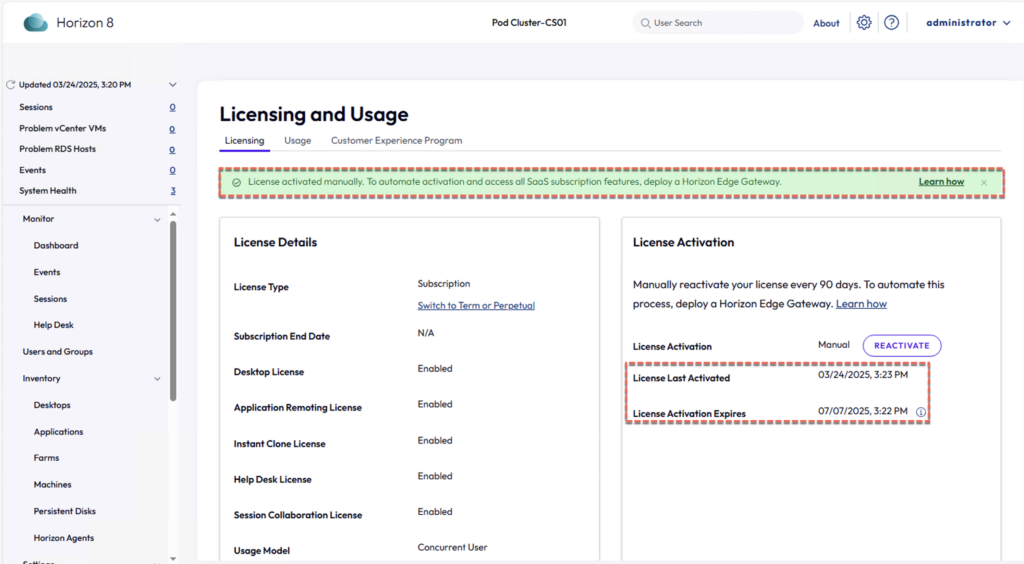
27. Once the license is activated successfully, you will auto redirected back to Horizon Connection Server admin console. Confirm the license is activated successfully in Horizon admin console as well.
Register Amazon WorkSpaces Core as Capacity Provider
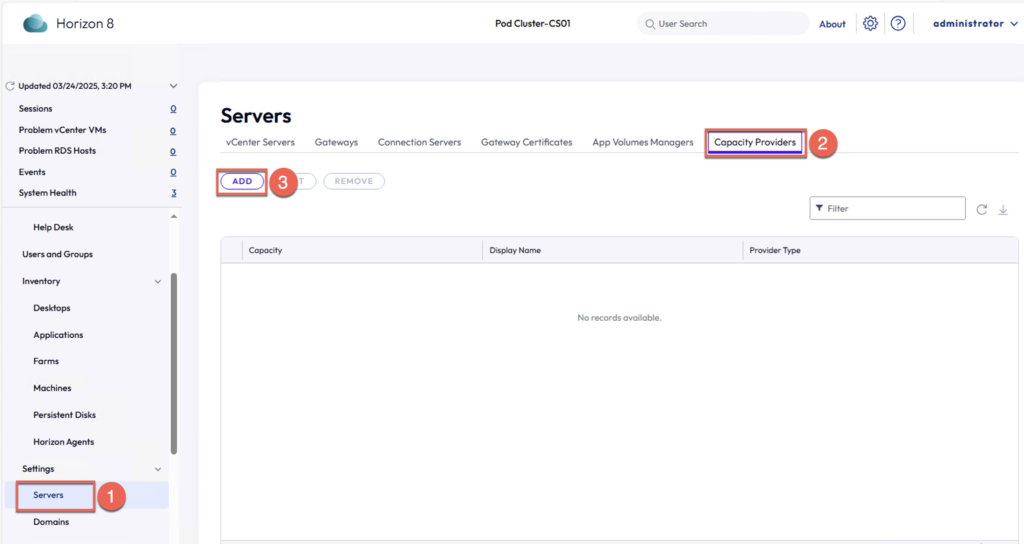
28. Navigate to [Servers] in the left pane of Horizon Admin console > [Capacity Providers] > [ADD].
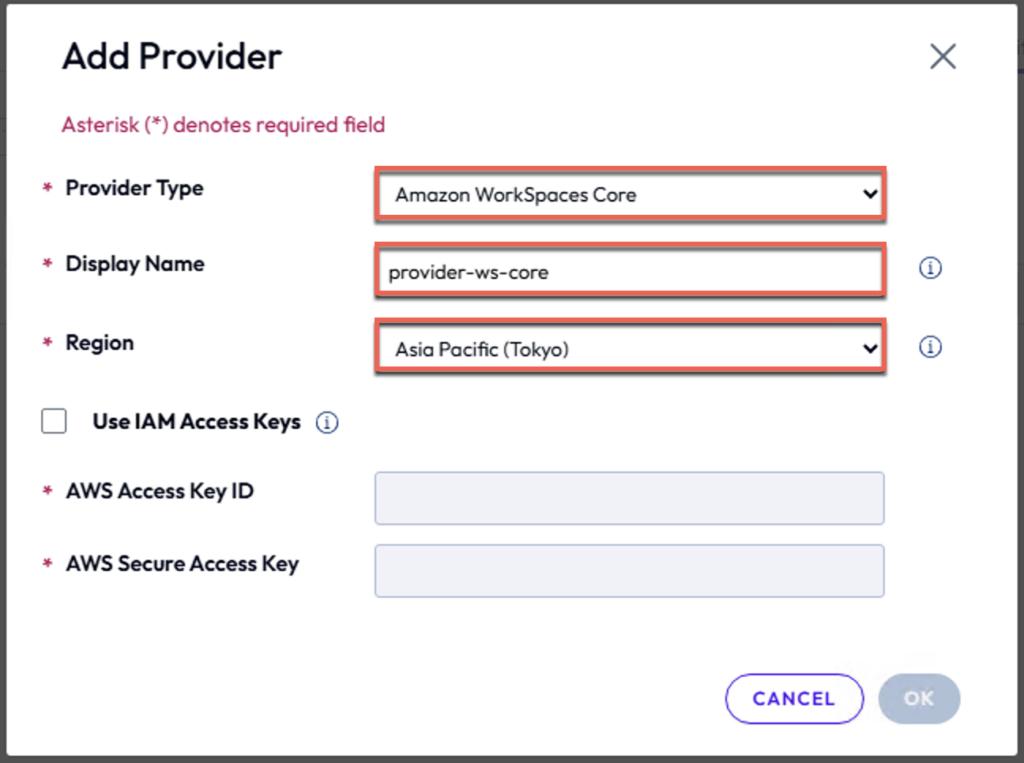
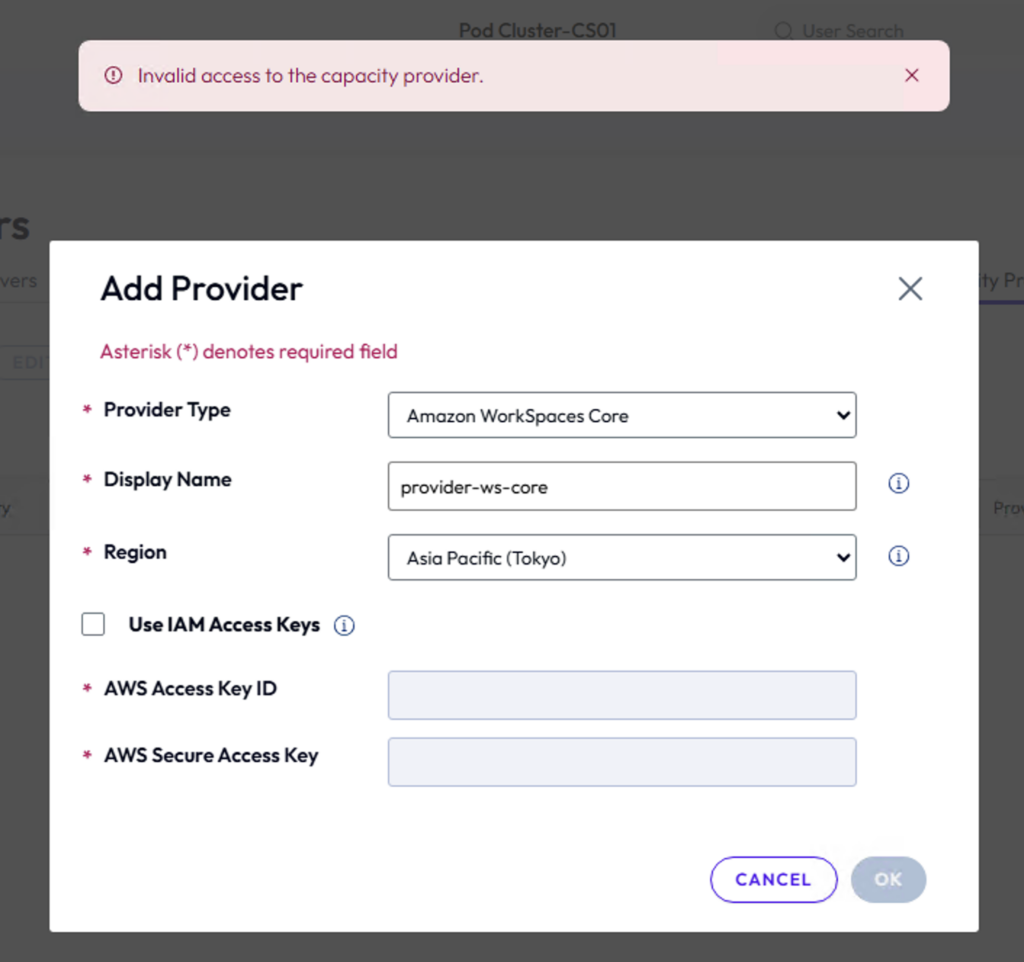
29. In provider type, select [Amazon WorkSpaces Core] from the dropdown > give the [Display Name] for your provider > select the AWS [Region] from the dropdown > [OK].
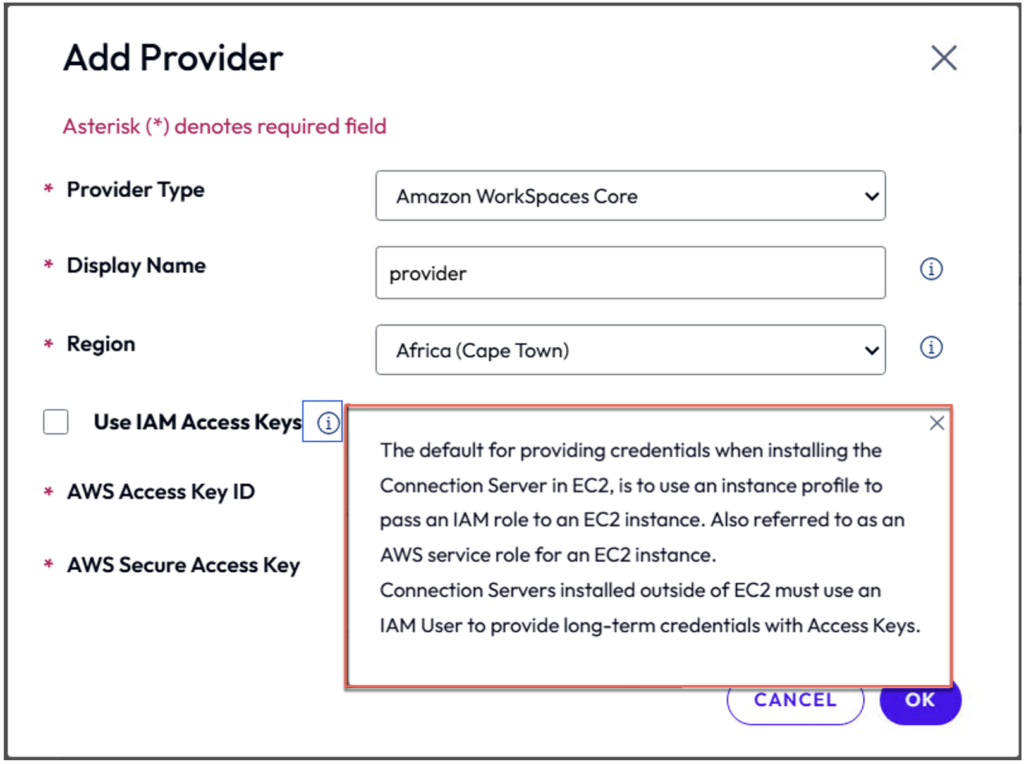
Note: If the Connection Server is installed on outside of EC2 instance must use an IAM User to provide long-term credentials with Access Keys.
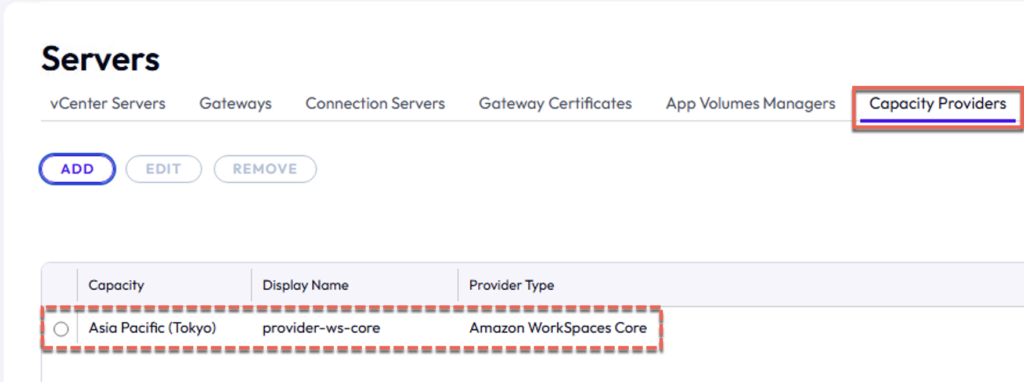
30. Confirm your provider has been added successfully.
Capacity provider registration tips:
While adding the Amazon WorkSpaces Core as capacity provider, you may see the error “Invalid access to the capacity provider”. There are 2 possible reasons either Connection Server EC2 machine does not have the proper IAM role or does not have the internet outbound. As I. mentioned in VPC/Networks section at the beginning of this post, we need to place the NAT gateway in front of Subnet where the Connection Server EC2 machine resides. Another way is to assign the public IP to the Connection Server EC2 machine itself but this is not the best practice from security perspective.
Unified Access Gateway (UAG) deployment
Please refer to my previous blog post for UAG deployment steps on native AWS cloud.
![]()