New version of VMware Unified Access Gateway (UAG) 3.9 has been released on 17 March 2020. As of released date, version 3.9 is supported for Horizon 7 version 7.5 to 7.12. For more detail please visit VMware Product Interoperability Matrices page.
VMware Unified Access Gateway 3.9 Release Notes Docs VMware
VMware Unified Access Gateway 3.9 Compatibility Notes Doc VMware
What is New in This Release
VMware Unified Access Gateway 3.9 provides the following new features and enhancements:
- Added support to combine Horizon Third-Party SAML authentication with the Horizon 7 and later versions for the Unauthenticated Access feature.
This option allows single sign-on remote access from Horizon clients or browser-based HTML Access to RDSH published applications based on entitlements using simple role-based user aliases in Active Directory. Individual user accounts in the SAML Identity Provider (IdP) are used and the user must successfully authenticate with the IdP. For this feature, only role-based user alias accounts are required in Horizon. Includes support through RADIUS and SecurID Unauthenticated methods with Horizon 7 and later versions for the Unauthenticated Access feature. - Extended the support for OPSWAT end-point compliance check integration
- Allows administrators to optionally upload the OPSWAT MetaAccess on-demand agent executables for Windows and macOS on Unified Access Gateway. The executables are then downloaded and run automatically by Windows and macOS Horizon clients as needed. This option is an alternative to using the continuously running OPSWAT MetaAccess persistent agent and does not require the end user to have to install the on-demand agent manually on their client device.
- Allows configuring periodic end-point compliance checks by Unified Access Gateway for Horizon clients during an authenticated Horizon user session. These periodic checks are optional and are in addition to the initial compliance check made when launching a desktop or application session.
- Added support for the combination of Horizon Smart Card Certificate or Passthrough authentication when a pre-login message is also configured on Horizon Connection Server.
- Added support for non-ASCII characters in Smart Card X.509 certificates used for authentication.
- Added support to configure the VMware Tunnel Proxy through the PAC file path or the URL in the .ini file, which gets configured during deployment through PowerShell.
- Qualified support for the AVI Networks load balancer used in front-ending Unified Access Gateway for Horizon and Web Reverse Proxy edge services.
- Added support to allow SSH option configuration during deployment, which can be done through the OVF template or in the .ini file, which gets configured during deployment through PowerShell.
- Added support for Unified Access Gateway to use the custom settings for VMware Tunnel and Content Gateway service when configured as a Key-Value pair through the Workspace ONE UEM Console.
- Added an option to set maximum TCP connections per session in the Unified Access Gateway Admin UI.
- TLS 1.1 is disabled by default. The Honor Cipher Order setting is no longer used as it is automatically enabled for Horizon and Web Reverse Proxy edge services.
Upgrade Existing UAG
Before proceeding UAG upgrade, please do not forget to check VMware official product interoperability matrices. Whether you are upgrading existing UAG or deploying as a new deployment, you need to deploy the UAG appliance from vCenter console. Or you can automate the deploy with PowerShell script comes with UAG.
1. Log into existing UAG admin console and download the config.JSON file.


2. Download UAG3.9 ova file from myvmware.com download page. You should have valid Horizon contract to be able to download the UAG ova file.

3. Deploy UAG 3.9 ova template from vCenter server console. If you are using the same IP addresses which are being used for the existing UAG appliances, please power-off the existing UAG appliance before deploying new appliance. If you have multiple UAG appliances in your environment, you can upgrade one by one which reduces the downtime.

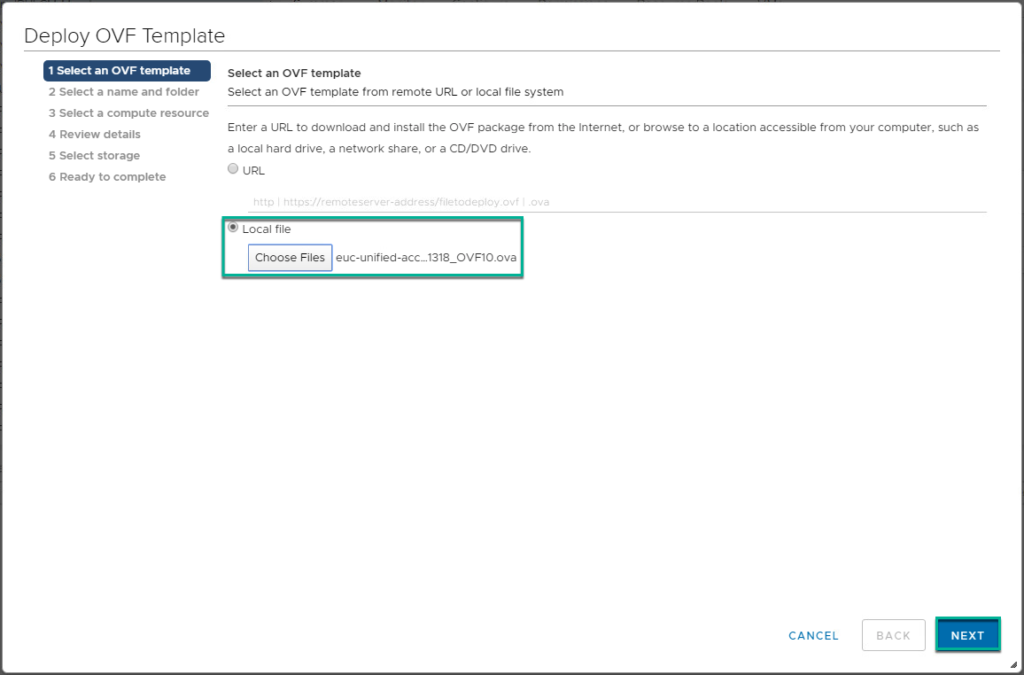
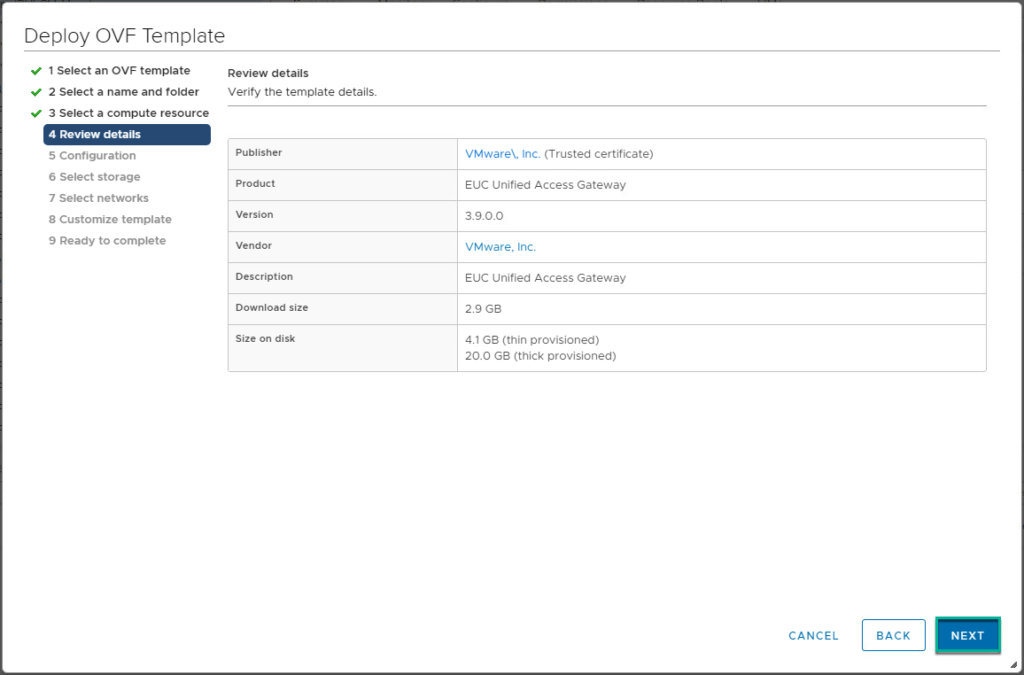
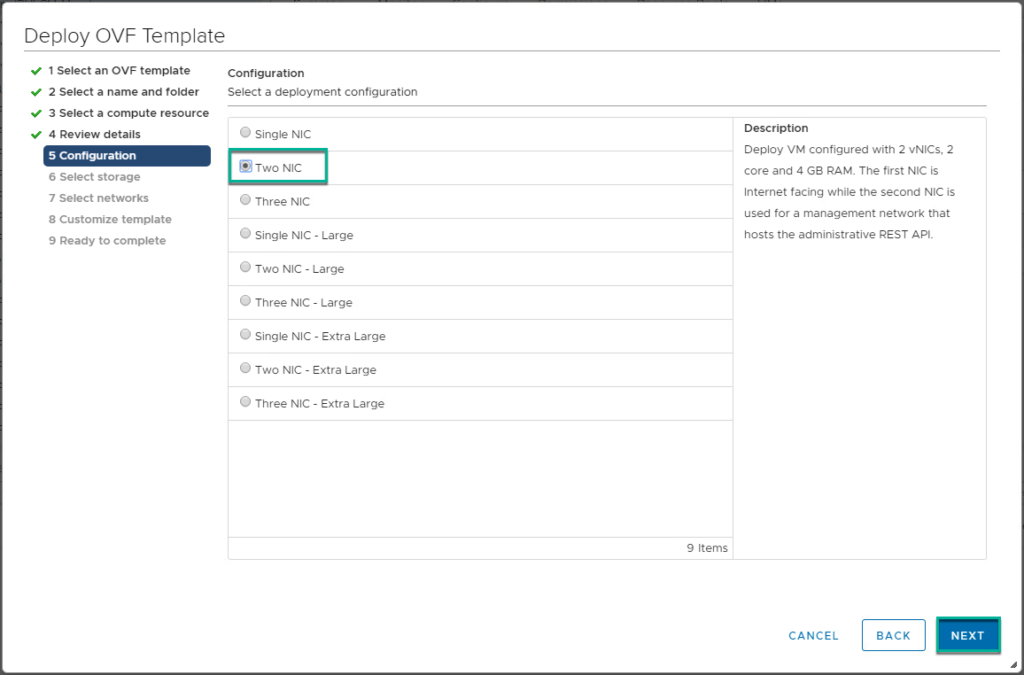
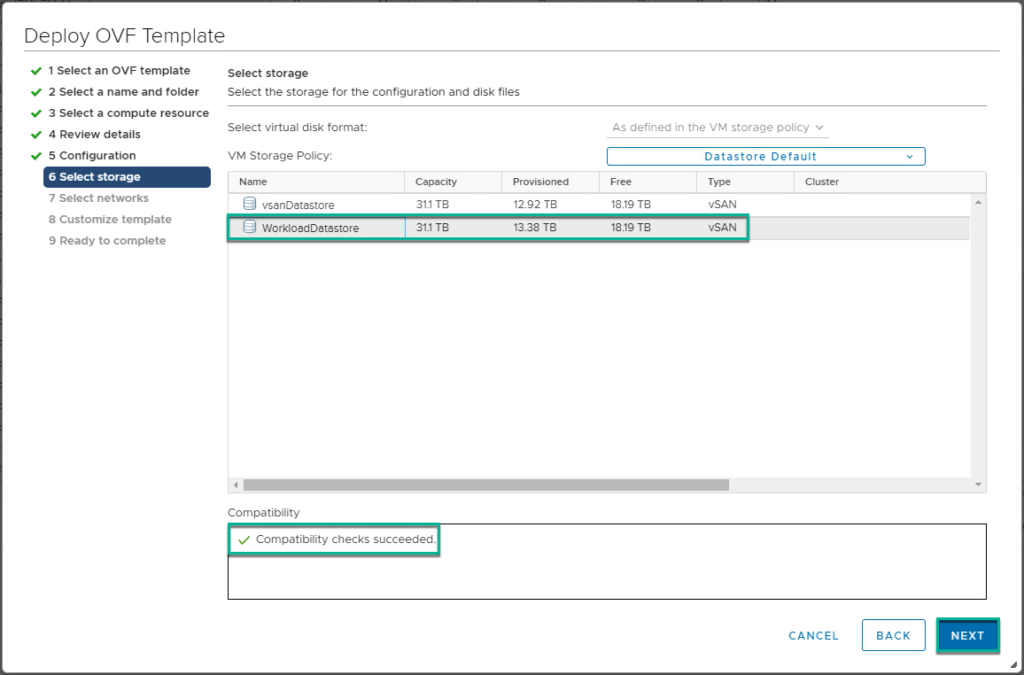
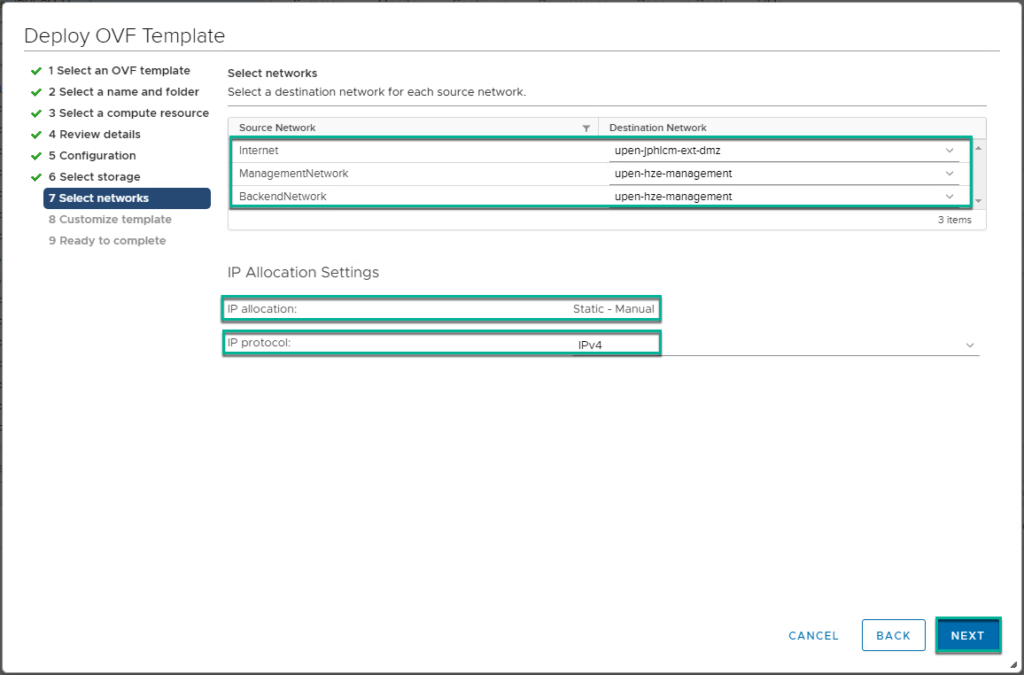
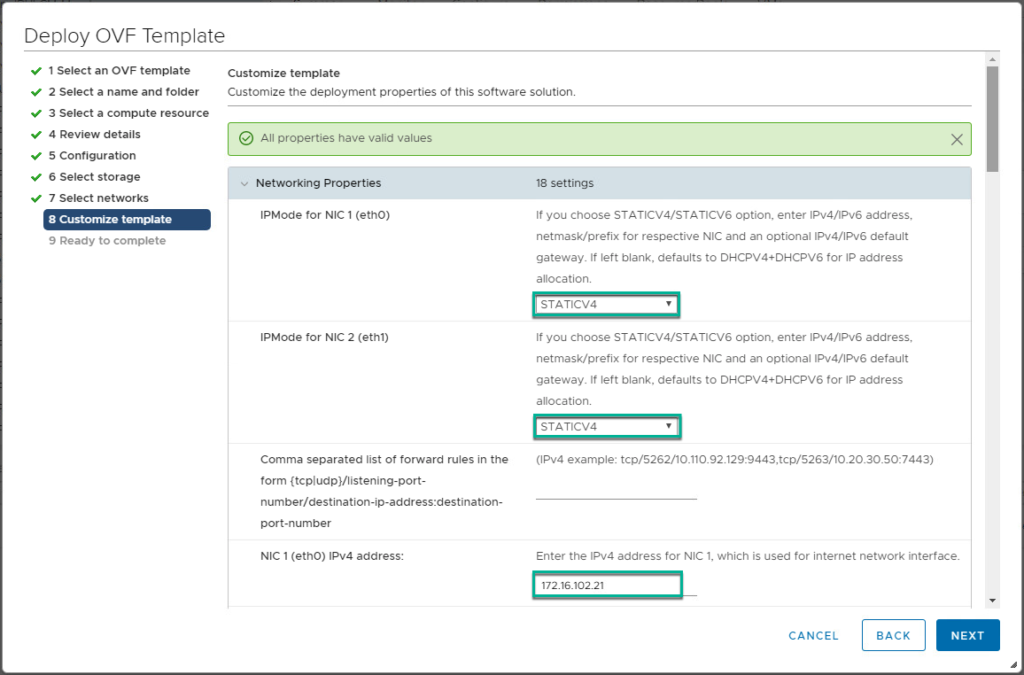
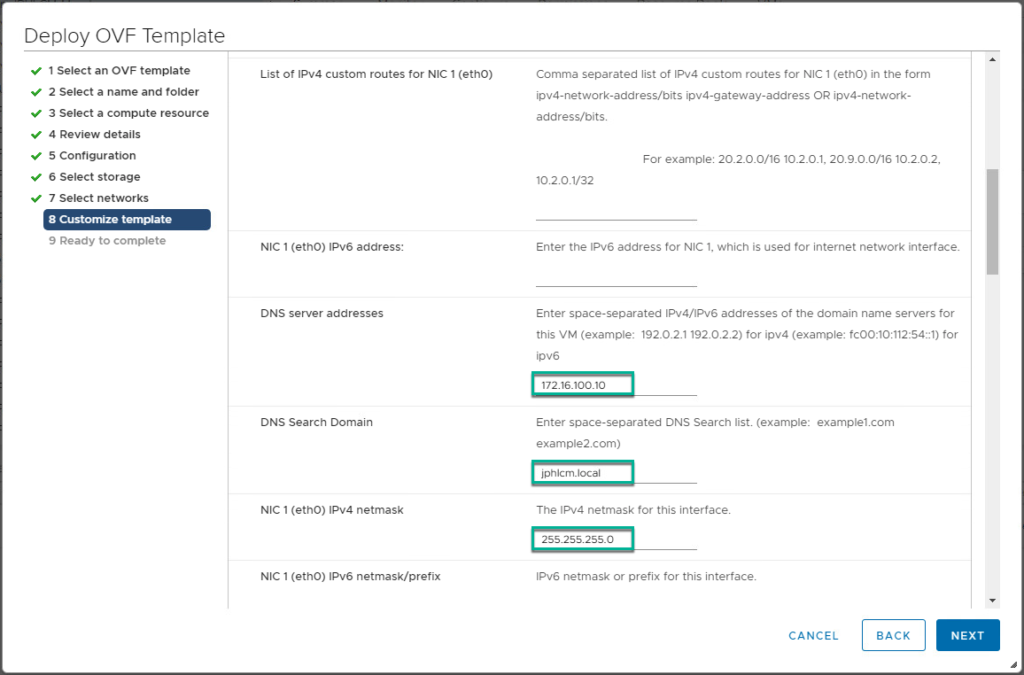
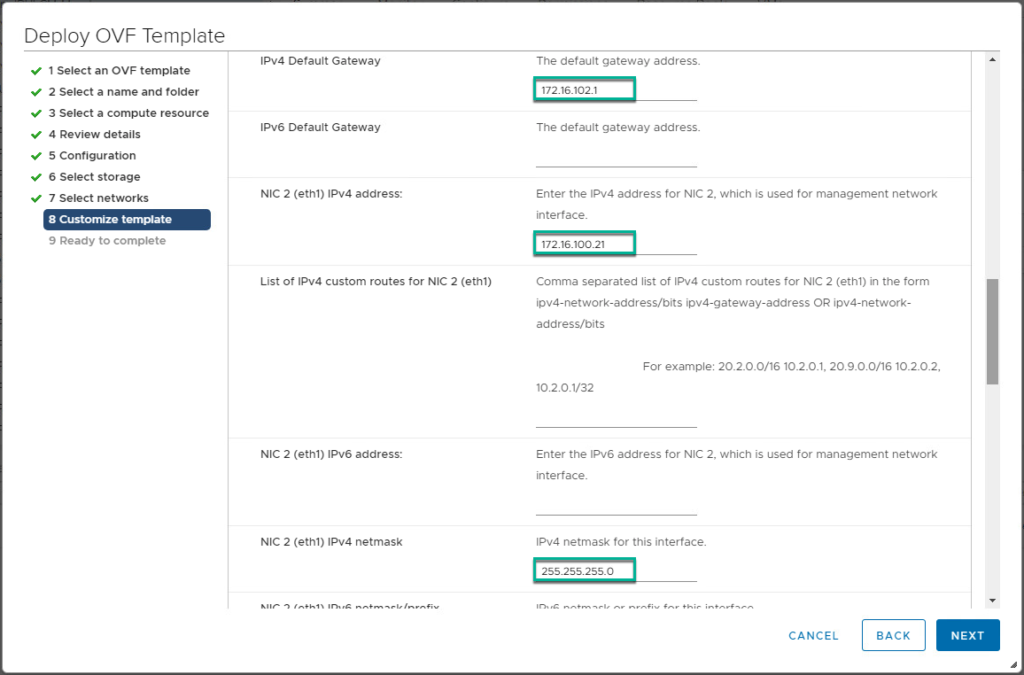
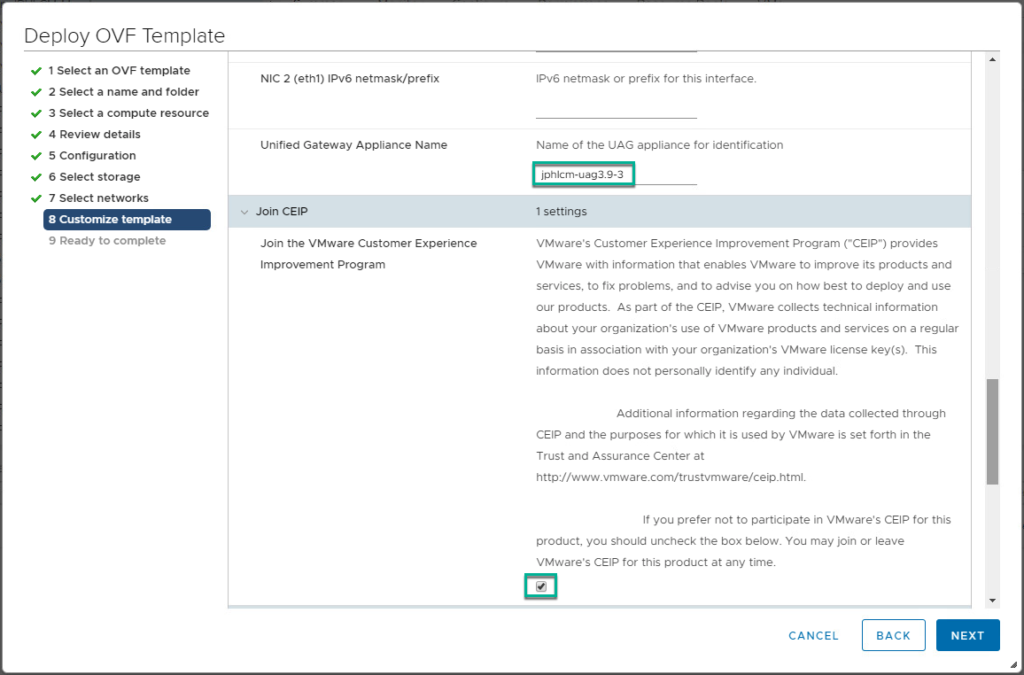
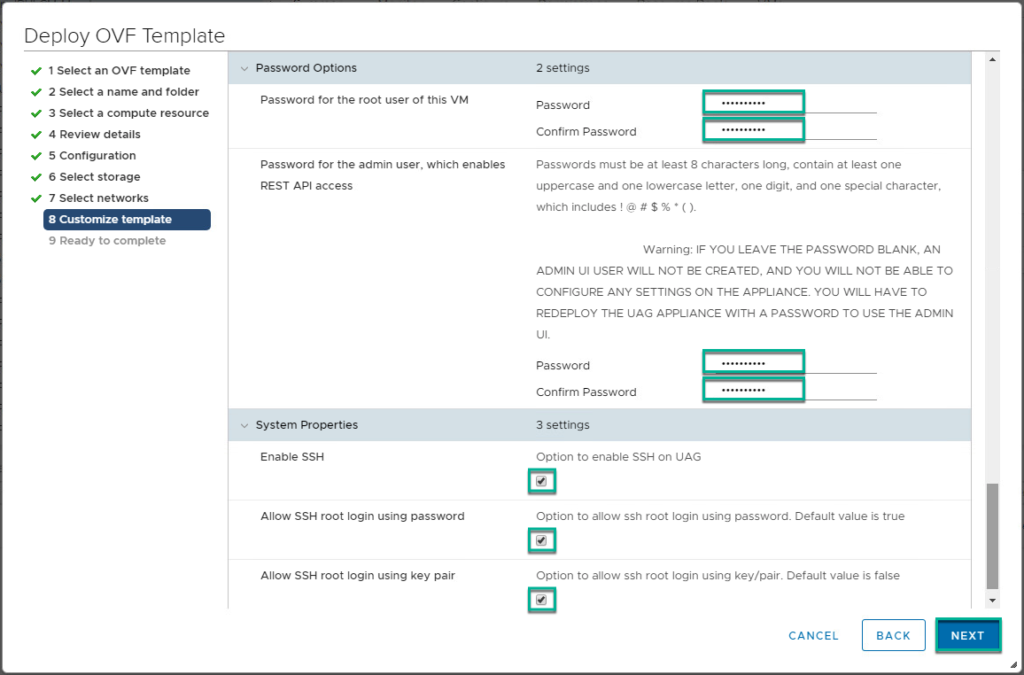
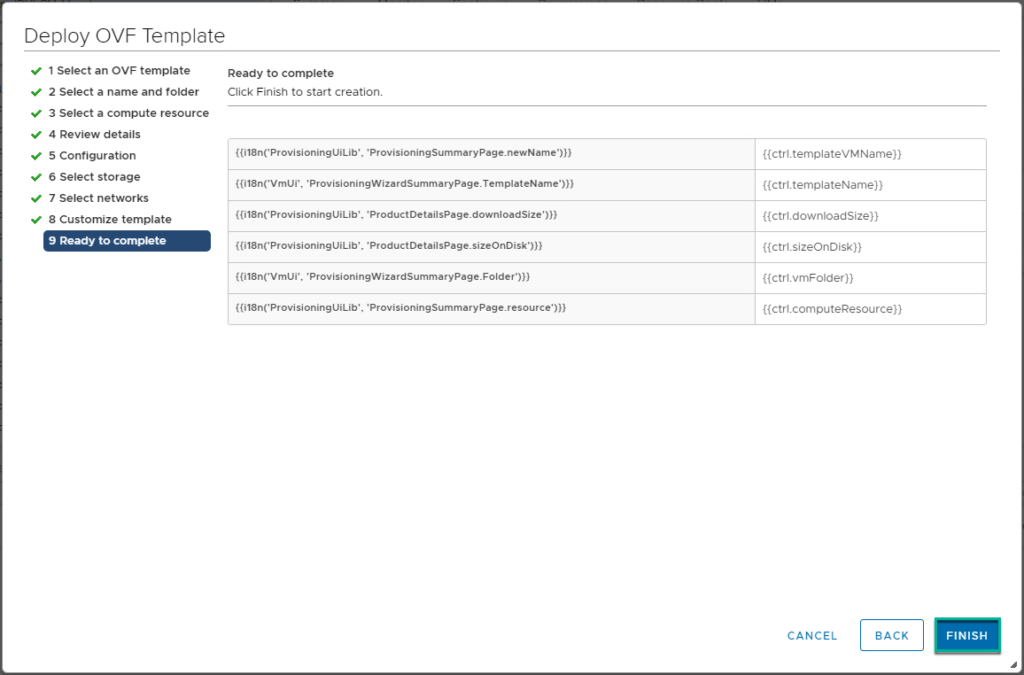
4. Confirm UAG appliance deployment has been completed and power it on from vCenter console.

5. Log into UAG as a root and verify the IP address, DNS are configured as expected.

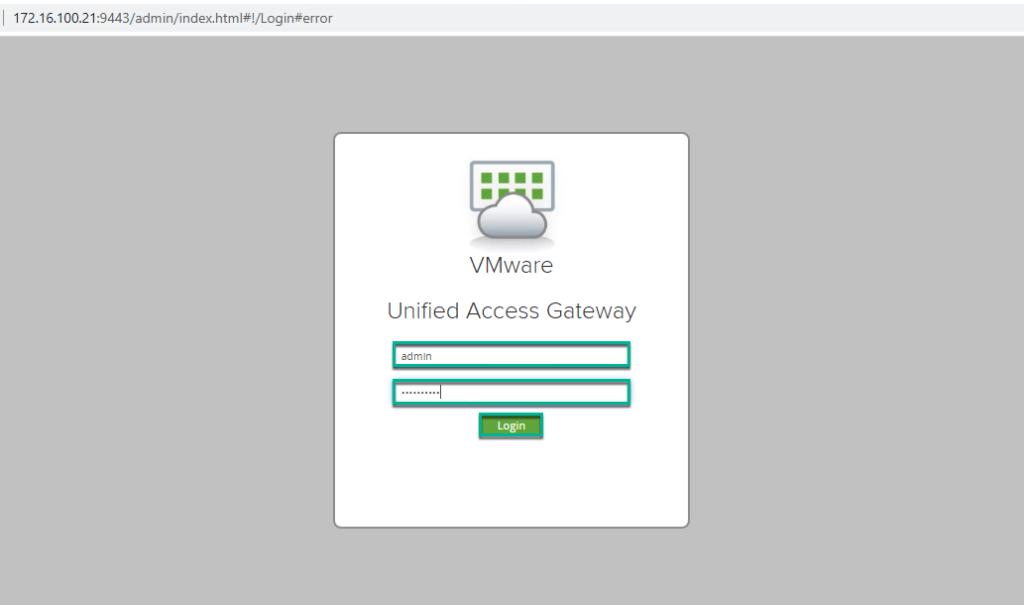
6. Access the UAG admin console and log in with username and password. You may need to wait couple of minuets to be able to access admin console since it takes some time to start the UAG services.
7. Import the UAG config.JSON file you’ve exported in step-1.
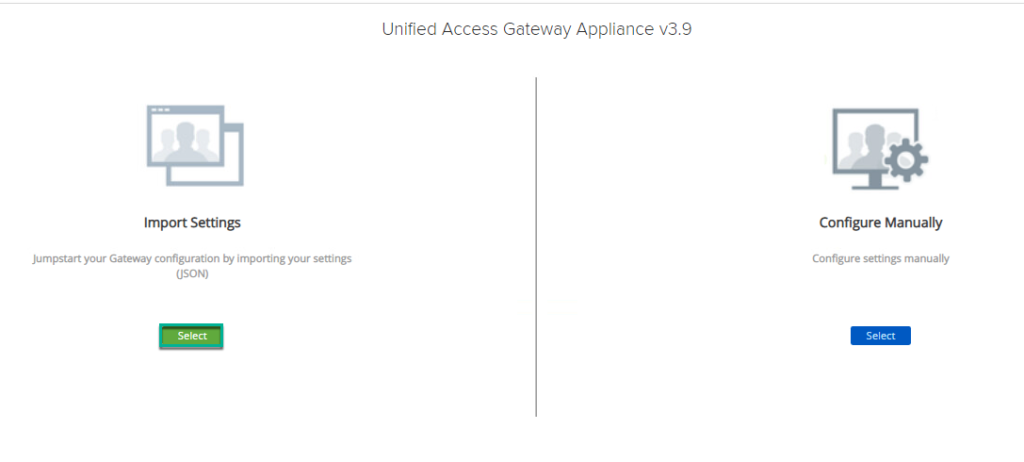
8. Click [Select] under Import Settings > [Browse] > select the config.JSON file > [Import].


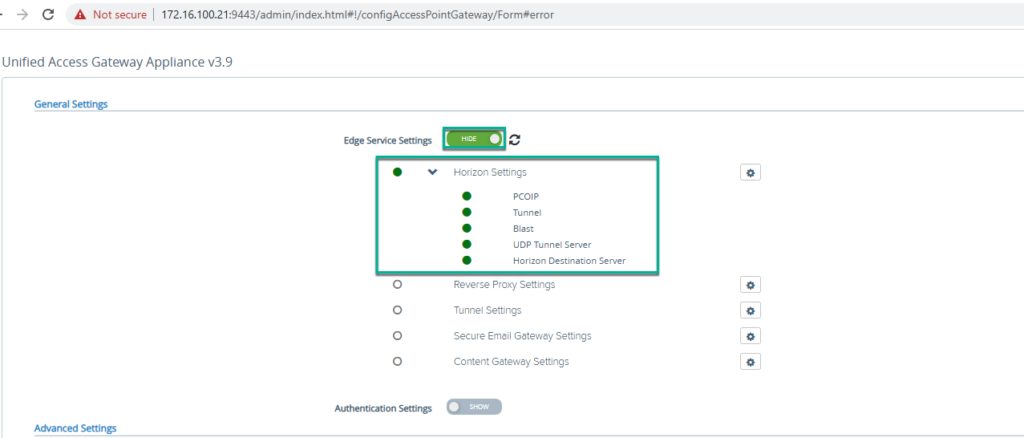
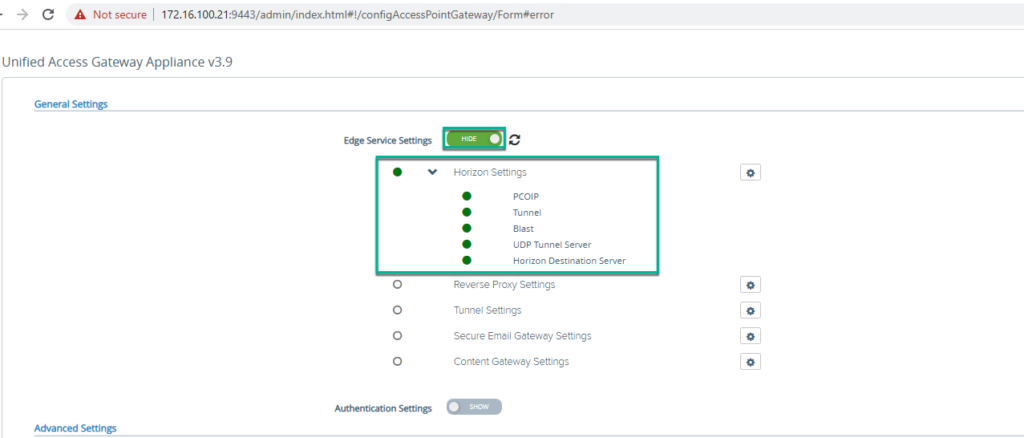
8. Go to UAG admin console main page > click on [Select] under [Configure Manually] > show [Edge Services Settings] > expand [Horizon Settings] and confirm all the edge services are showing as GREEN as per your configuration.
Upload Certificate
Certificate is not included in config.JSON file. So you need to upload the certificate manually.
9. Go to UAG admin console main page > click on [Select] under [Configure Manually] > [Advanced Settings] > click on gear button next to [TLS Server Certificate Settings].
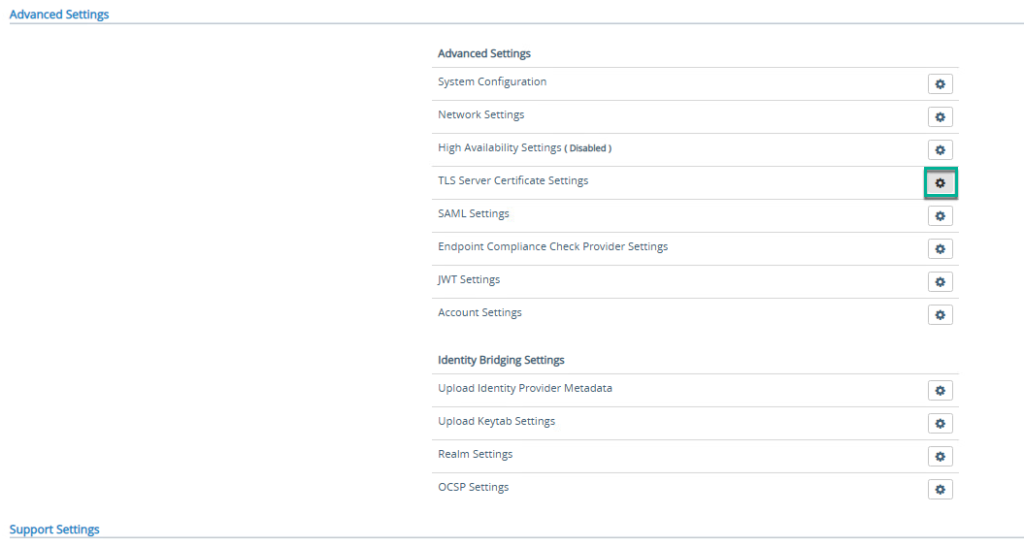
10. Upload the certs which were being used in existing UAG and [Save].

11. Confirm below message.

12. Click on gear button next to [System configuration] and give the name of your choice to new UAG and [Save].

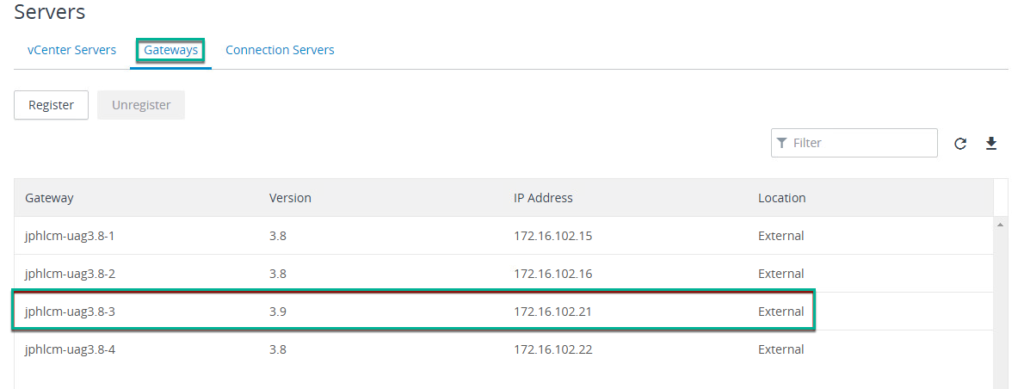
13. Login to Horizon Connection Server admin console > [Settings] > select [Servers].
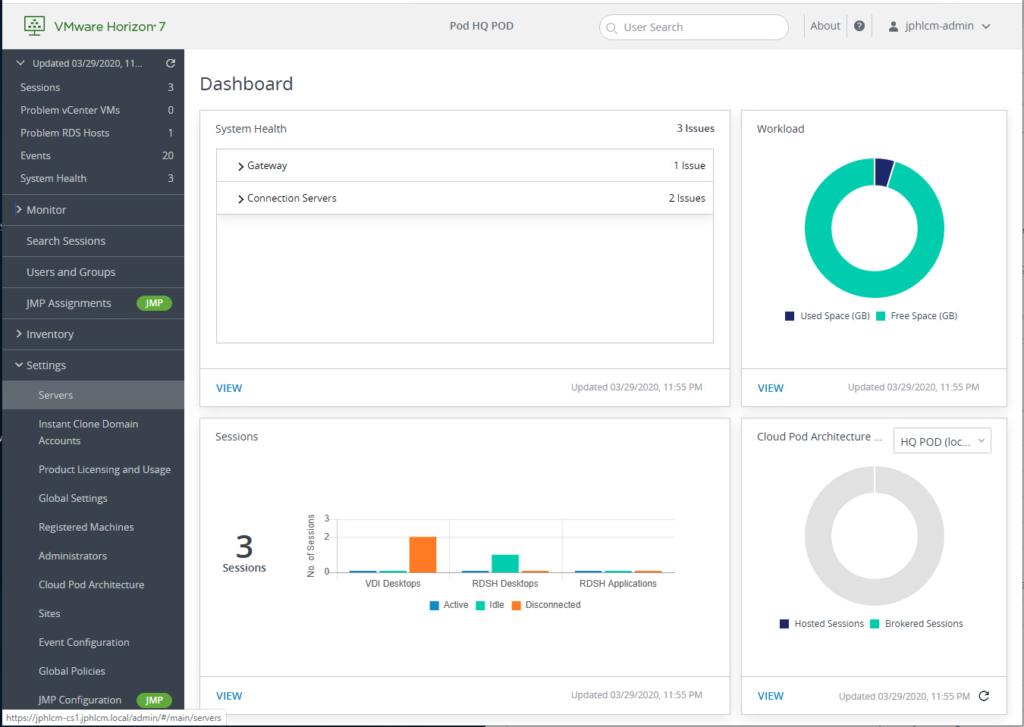
14. Select [Gateways] > unregister the existing UAG > register with the name you gave in step-12. After sometime you will see the detail of UAG version, IP address and location.
UAG New Deployment
If you are deploying UAG for new Horizon deployment, the process will be same from step-3 to step-6. In addition, you need to configure the Edge Services Setting as per your requirement.
15. Log into UAG admin console > click [Select] under [Configure Manually] option > [Edge Service Settings] > click on gear icon next to the [Horizon Settings].
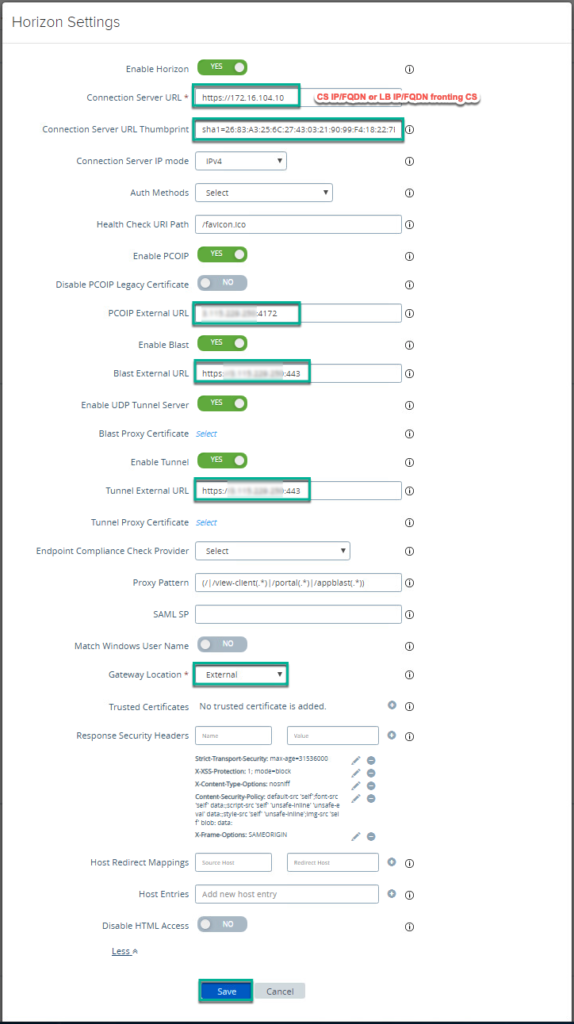
16. Confirm all the edge services are showing as GREEN as per your configuration.
17. Access desktops/applications from View Client or Browser and confirm if the session is showing in UAG admin console as well.

![]()